
This Onigiri Japanese Rice Balls recipe comes together in about 30 minutes and uses a simple hands-on technique for a quick meal that your family will absolutely love! Switch up the fillings and toppings to suit your taste or use it as a ‘clean out the fridge’ meal to get rid of leftover ingredients! Trust me, these rice balls are not just fun to make, they’re also a fantastic way to bring some joyful Japanese flavors into your weeknight dinners.
Ingredients Needed
- 3 cups cooked rice
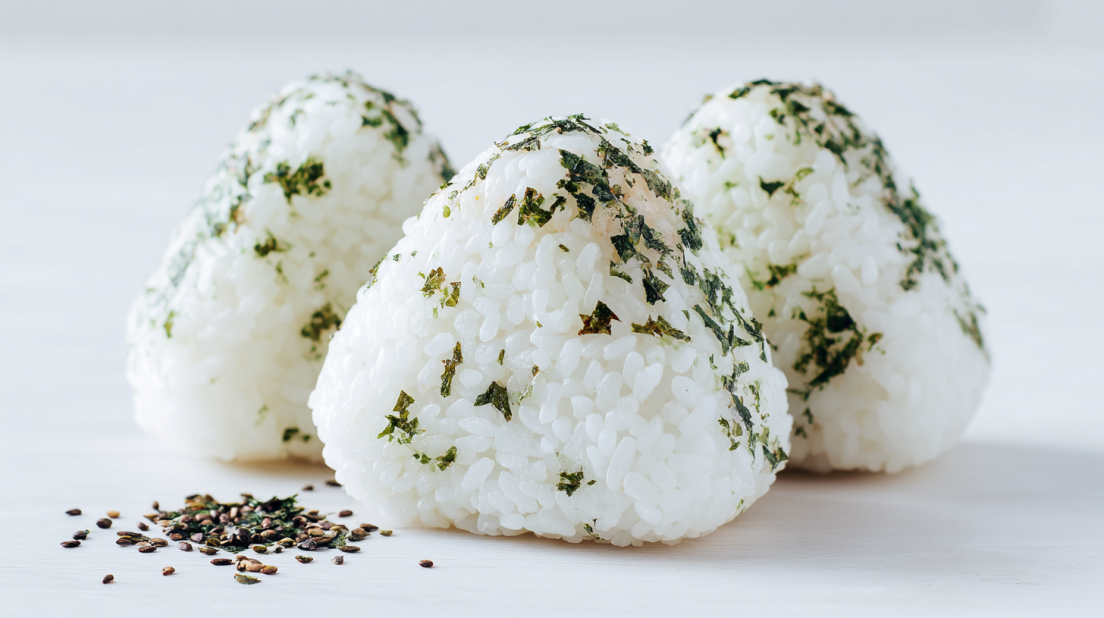
- 2 tablespoons furikake
- Water (just to wet your hands)
- Kosher salt (to sprinkle on your hands)
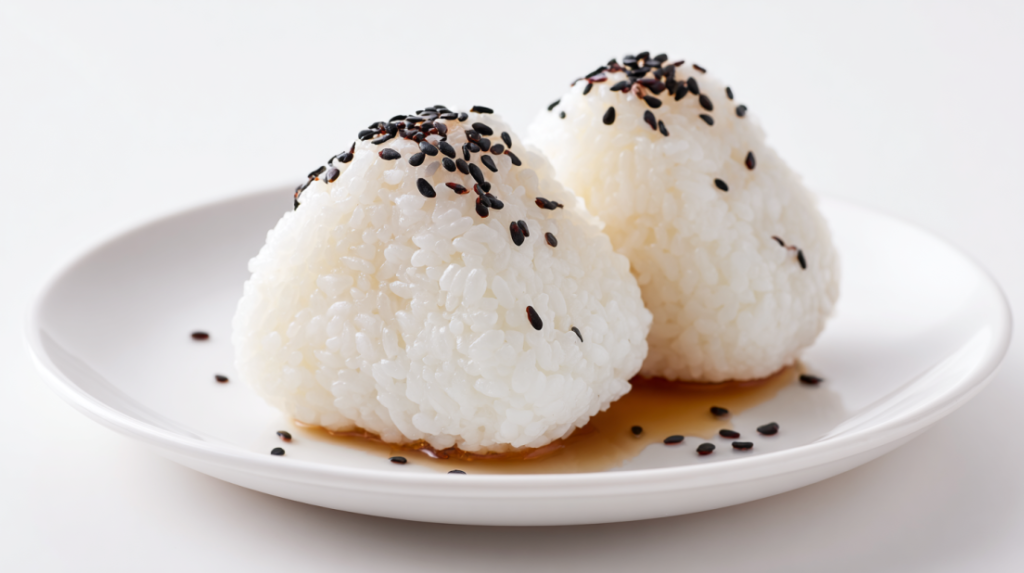
- 2 sheets roasted nori (cut into small strips)
- Sesame seeds
Let’s Get Cooking!
Making these Onigiri Japanese Rice Balls is straightforward and so much fun! Here’s how you do it:
Prepare the Rice : Place the cooked rice into a mixing bowl and sprinkle on the furikake. You can use as little or as much as you’d like, don’t be shy with it! Mix everything together gently until fully combined. (This should take about 2-3 minutes, and the smell is already amazing!)
Wet Your Hands : Grab a small bowl of water and wet your hands. This is just to keep the rice from sticking to your fingers. Next, sprinkle on a little kosher salt onto your hands, this will help flavor the rice balls while you work.
Shape the Onigiri : Scoop about half a cup of the warm rice (or a third if you want to make them smaller) into your hands. Gently press the rice into a triangle shape using both hands. It doesn’t have to be perfect (we’re going for homemade charm here!), but aim for a nice triangle shape. You might want to press the sides a little against a cutting board or flat surface to help define the shape; it’s all about a simple press!
Add the Nori and Sesame Seeds : Now, place one strip of nori at the bottom of your shaped onigiri. If you’re using sesame seeds, sprinkle a few on top for that extra texture and flavor. Repeat this process until you’ve made all your rice balls. This usually takes about 10-15 minutes.
Serving Up! Enjoy your onigiri immediately, or if you need to pack them for lunch or a later snack, wrap each one individually with plastic wrap. They are best enjoyed the same day but will keep in the fridge for about a day or two if needed.
And that’s it! You’ve successfully made delicious Onigiri Japanese Rice Balls. They’re perfect for a quick lunch, a snack, or even dinner on those busy weeknights!
Why I Love This Recipe
This Onigiri Japanese Rice Ball recipe is truly one of my go-to meals. I’ve always adored comfort food that is both simple and satisfying. It brings back sweet memories of family dinners and cozy evenings at home. I’m a real sucker for any dish that allows me to adapt it to whatever I have available. You can stuff these rice balls with all sorts of fillings, like pickled vegetables, cooked meats, or even an omelet (omurice anyone?) the best part is, you really can use whatever you’ve got on hand!
If you loved this onigiri recipe, be sure to check out my Spicy Tuna Rice Balls, my okonomiyaki, or my Japanese Pork Curry!
Why This Recipe Works
Quick & Easy
This dish comes together in literally no time at all, under 30 minutes! Perfect when you’re in need of a quick bite before heading out or when the kids are asking, “What’s for dinner?”
Make-Ahead Friendly
These little gems are phenomenal when it comes to meal prep! You can make a batch ahead of time, wrap them, and stash them in the fridge for healthy snacks throughout the week.
Customizable
The secret is in your hands, use whatever fillings and toppings you like! From grilled veggies to shredded chicken, or even tasty tofu, you’ve got options.
Crowd-Pleaser
They’re fun to make and even more fun to eat! You can get the family involved in shaping the rice balls, and I can guarantee kids will love these colorful little bites.
Budget-Friendly
All the ingredients are everyday affordable foods! You probably already have a good chunk of these in your pantry.
How to Serve This Recipe
Onigiri is great on its own, but it pairs wonderfully with various side dishes! Think of a colorful fresh salad, some steamed edamame, or a side of miso soup to really amp up the Japan-inspired flavors.
Serving Suggestions:
- Pair with a light green salad drizzled with sesame dressing.
- Serve alongside some homemade miso soup for a comforting meal.
- Pack them into lunchboxes with carrot sticks and a fruit salad for a balanced meal!
Storage Guidelines:
Your onigiri will last about 1-2 days if stored in an airtight container in the fridge. They do get a bit drier the longer they sit, so it’s best to eat them fresh. If you’d like to store them longer, you can freeze them! Just wrap each in plastic wrap and place in a freezer-safe bag; they’ll keep for about a month. To reheat, simply let them thaw in the fridge overnight, and warm them in the microwave for about 30 seconds to 1 minute.
Final Thoughts
This Onigiri Japanese Rice Balls recipe is one that has earned a permanent spot in my kitchen lineup! No fuss, tons of flavor, and easy enough to whip up on a whim. Plus, they’re an exciting way to introduce your family to different cuisines while enjoying some quality family time.
So go ahead, roll up your sleeves, gather your kids, and have some fun making these adorable rice balls… they’re not just delicious, they’re a way to connect, create memories and enjoy meal times together!
Happy Cooking! Follow us on Pinterest for daily meal inspiration!
Onigiri Japanese Rice Balls
Ingredients
Method
- Place the cooked rice into a mixing bowl and sprinkle on the furikake. Mix gently until fully combined.
- Grab a small bowl of water and wet your hands to prevent the rice from sticking.
- Sprinkle a little kosher salt onto your hands to add flavor.
- Scoop about half a cup of rice into your hands and gently press into a triangle shape.
- Optionally, press the sides against a flat surface for better definition.
- Place one strip of nori at the bottom of each onigiri and sprinkle sesame seeds on top if using.
- Repeat until all rice balls are shaped.
- Enjoy immediately or wrap individually to store. Best enjoyed the same day.