
This Chocolate Covered Orange Peels recipe comes together in about 60 minutes, and it’s a delightful no-bake treat that your family will absolutely love! You can switch up the chocolate or even toss in some nuts or spices to suit your taste, making this a versatile treat that’s perfect for those times you want to clean out the fridge or just get creative in the kitchen!
The Sweet Ingredients You’ll Need
- 4 large oranges, thick-skinned (like navel or Valencia)
- 2 cups granulated sugar (plus more for coating)
- 2 cups water
- 8 ounces dark chocolate, chopped or chips
Let’s Get Cooking!
Step-by-Step Instructions
Prep the Oranges: Start by washing your oranges thoroughly. Peel them, then cut the peels into 1/4-inch wide strips. Don’t stress about getting each one perfect; every little imperfection adds character to your treats! Remove as much white pith as you can, but a little left over is completely fine.
Blanch the Peels: Place those orange peels into a pot of cold water, then bring it to a boil. After boiling, drain the peels and repeat this same process two more times with fresh water each time. This step might seem repetitive, but it’s crucial for removing that bitter taste trust me, it makes all the difference.
Create the Simple Syrup: In another saucepan, combine 2 cups of sugar and 2 cups of water. Stir to dissolve the sugar over medium heat, and then toss in your blanched orange peels. Bring to a simmer, then reduce heat to low and let them cook for 45–60 minutes until they are translucent. You’ll know they’re done when they look clear and glistening, your kitchen will smell like an orange orchard!
Remove and Dry: Using a slotted spoon, carefully transfer your peels from the syrup to a cooling rack or a lined baking sheet. Allow them to dry for about 4 to 6 hours or if you can be patient, overnight is even better! Once they’re tacky, you can roll them in extra sugar if you like a sweeter bite.
Melt the Chocolate: Time for the fun part! Melt your dark chocolate in a double boiler or microwave in 30-second intervals, stirring in between until the chocolate is smooth and glossy. Careful not to burn it, nothing worse than burnt chocolate!
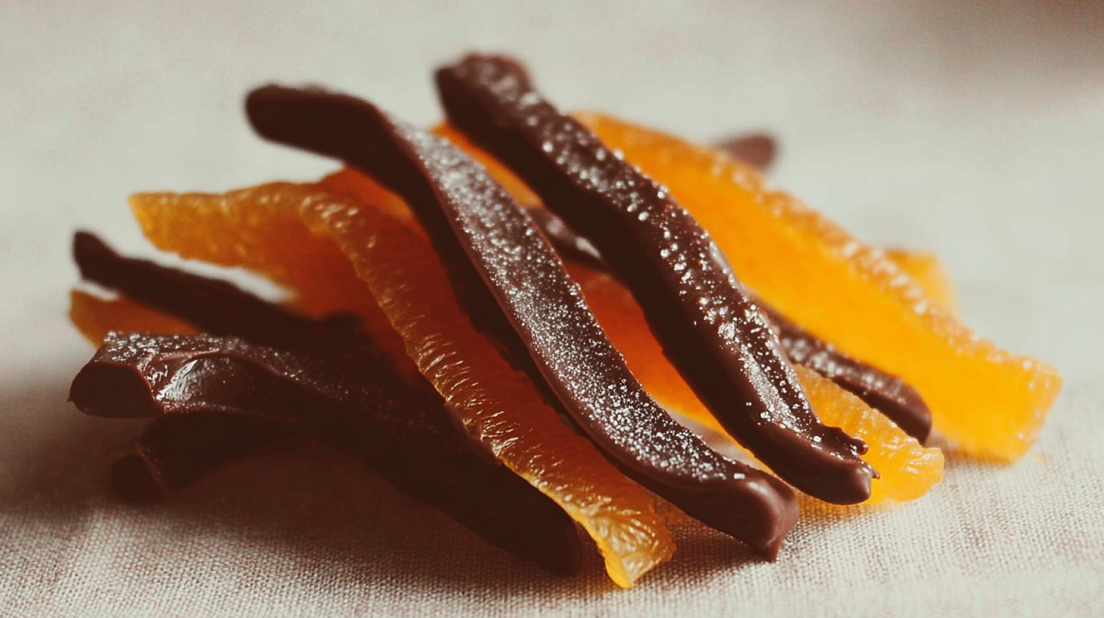
Dip and Set: Dip each dried peel halfway into the melted chocolate, letting the excess drip back into the bowl. Place them on parchment paper to set. If you’re feeling extra fancy, a brief chill in the fridge will help them harden quickly.

And voila! Just like that, you’ve created a deliciously sweet treat that’s perfect for any occasion!
Why I Love This Recipe
This is my go-to recipe for when I want to impress guests or when friends drop by unexpectedly. The best part is that it’s simple enough that my kids can help! Every time I make these Chocolate Covered Orange Peels, I think back to warm, sunny afternoons spent in the kitchen with my family. Seriously, I’m a real sucker for anything chocolate-covered, add some citrus to it, and I’m in dessert heaven! Plus, whatever odds and ends you have in your pantry can elevate this recipe, so there’s really no wrong way to go about it!
If you loved this recipe, be sure to check out my delicious Easy Magic Candy, my Grapefruit Bars, or my Boozy Bourbon Cherries!
Why This Recipe Works
Quick & Easy
This recipe comes together in under 60 minutes (minus the drying time, of course). It’s one of those delightful treats that doesn’t require hours of prep, making it perfect for busy evenings or surprise gatherings.
Customizable
One of the best parts? You can mix and match flavors! Want to add a sprinkle of sea salt or some crushed nuts? Go for it! I’ve even added a touch of cinnamon, and the flavor explosion was incredible!
Make-Ahead Friendly
These sweet treats can last up to 2 weeks in an airtight container, but I doubt they’ll last that long, they’re just too good! They’re perfect for planning ahead for parties or even holiday gifts.
Crowd-Pleaser
Trust me when I say, these Chocolate Covered Orange Peels are a crowd-pleaser. Friends and family will want to come back for more, and they’re always impressed when I tell them how easy they were to make!
How to Serve and Store This Delight
Serving Suggestions
Serve these treats as a charming addition to a dessert table, or pack them in a cute tin for gifts! They’re also a wonderful complement to a nice cup of tea or coffee.
Storage Tips
Store your Chocolate Covered Orange Peels in an airtight container at room temperature for about two weeks. Trust me, you’ll want to find a good hiding spot because they go fast!
Freezer Friendly? Yes!
You can freeze these little delights! Just place them in a single layer on a parchment-lined baking sheet to firm up, then transfer to an airtight container with parchment paper between layers. They’ll stay fresh for up to two months. Just thaw them for a bit at room temperature before serving!
A Few Final Thoughts
So, get those oranges ready and dive into making these amazing Chocolate Covered Orange Peels! Honestly, they’re a sweet labor of love that’s sure to spark joy for you and your loved ones. You’ll want to keep a stash on hand because they’re perfect for treating yourself after a long day or sharing with friends. Enjoy being the hero of your kitchen! Follow us on Pinterest for daily baking inspiration that brings warmth to you
Happy cooking, friends!
Chocolate Covered Orange Peels
Ingredients
Method
- Wash the oranges thoroughly. Peel them, then cut the peels into 1/4-inch wide strips, removing as much white pith as possible.
- Place the orange peels in a pot of cold water, bring to a boil, and drain. Repeat the process two more times to remove bitterness.
- Combine 2 cups of sugar and 2 cups of water in a saucepan over medium heat. Stir to dissolve sugar, add blanched orange peels, and simmer for 45-60 minutes until translucent.
- Carefully transfer the peels from the syrup to a cooling rack or lined baking sheet. Allow them to dry for about 4 to 6 hours or overnight.
- Melt the dark chocolate in a double boiler or microwave in 30-second intervals, stirring until smooth.
- Dip each dried peel halfway into the melted chocolate and place on parchment paper to set. Chill in the fridge to harden quickly if desired.