
These Sourdough Discard Waffles come together in about 20 minutes and are made with just a mixing bowl and a waffle iron for a quick and easy breakfast that your family will love! Trust me, your busy mornings just got a whole lot easier and much tastier!
Ingredients
Okay, let’s break down what you’ll need for these amazing waffles. This recipe is super flexible, so feel free to get creative!
1 cup sourdough discard: This is what makes these waffles so unique! If you’ve got some sitting in your fridge, now’s the time to use it. It adds a lovely tanginess that pairs perfectly with the sweetness of the waffles.
1 cup all-purpose flour: You could also use whole wheat flour for a healthier twist or even a gluten-free blend if you’re looking for something different!
1 tablespoon sugar: Just a touch of sweetness to complement those deliciously tangy flavors.
1 teaspoon baking powder: This helps your waffles rise and get that lovely crispy exterior.
1/2 teaspoon baking soda: The real unsung hero here, this activates the sourdough discard, making your waffles fluffy!
1/4 teaspoon salt: Just a couple pinches to enhance all those incredible flavors.
1 egg: Helps bind everything together. I like to use large eggs for a little extra richness.
1/4 cup milk: Add more or less depending on how thick you want your batter. You could also use almond milk or oat milk for a dairy-free option!
2 tablespoons melted butter: This gives the waffles a rich taste and keeps them moistened. You could substitute this with oil if you prefer!
1 teaspoon vanilla extract: This little flavor bomb really elevates your waffles to the next level! Trust me on this one.
Let’s Get Cooking!
Preheat your waffle iron. Set it to medium heat and let it get nice and hot while you prep the batter. You want those waffles to emerge perfectly golden brown!
In a mixing bowl, combine the sourdough discard, flour, sugar, baking powder, baking soda, and salt. Just use a whisk and make sure everything’s incorporated evenly. It’s a super quick step!
In another bowl, whisk together your egg, milk, melted butter, and vanilla extract. You’ll need to break up that egg so it’s nice and combined. It should look smooth and creamy.
Pour the wet ingredients into the dry ingredients and mix until just combined. Seriously, you don’t want to overmix; a few lumps are totally fine! It keeps your waffles fluffy.
Lightly grease the waffle iron if necessary; some irons are non-stick, but it never hurts to be safe. If you’ve got cooking spray, that works like a dream!
Pour the batter into the waffle iron. Each waffle iron is different, so I like to go for about 1/2 cup of batter, but you may need to adjust that depending on your iron’s size.
Close the waffle iron and cook according to the manufacturer’s instructions until they’re golden brown. This usually takes about 5 minutes, but keep an eye on it. You want that heavenly, crispy texture!
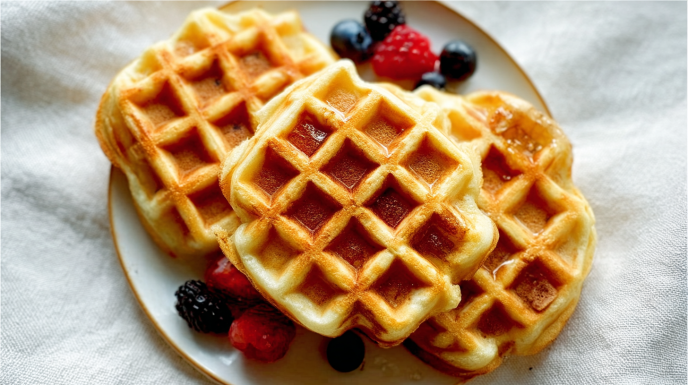
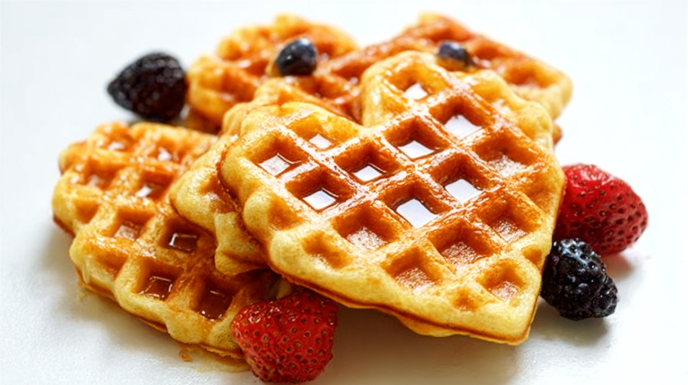
Serve warm with toppings of your choice! Fresh berries, syrup, whipped cream, all the good stuff. Get ready for your family to hog these like there’s no tomorrow!
If you loved this recipe, be sure to check out my my Banana Bread, my my Creamy Mac and Cheese, or my my Chocolate Chip Cookies! You won’t want to miss them!
Why This Recipe Works
Quick & Easy
These Sourdough Discard Waffles come together in less than 30 minutes, making them perfect for hectic mornings! Just whip up the batter, pour it into the waffle iron, and you’re all set.
Budget-Friendly
Using leftover sourdough discard (which might otherwise just sit in the fridge) means you’re saving both time and money! The other basic ingredients are pantry staples that you probably already have at home!
Customizable
The beauty of these waffles is their flexibility! You can add things like chocolate chips, nuts, or fruit to the batter for a unique twist every time. Let your creativity run wild!
Comfort Food
There’s something about waffles that just screams comfort, don’t you agree? Crispy on the outside, fluffy on the inside, these waffles are loaded with flavor and sure to bring a smile to your face.
Meal Prepping
You can actually make a double batch ahead of time, freeze them, and just toast them from frozen for a quick breakfast during busy weekdays. Seriously, the perfect hack!
Serving Suggestions
When it comes to toppings, you can really let your imagination run wild! Here are some of my favorites:
- Fresh berries (strawberries, blueberries, raspberries, go wild!)
- Whipped cream or Greek yogurt for some creaminess
- A drizzle of real maple syrup, I mean, what’s breakfast without it?
- Nut butters, almond, peanut, or cashew all work great!
- Dark chocolate chips or chunks for those sweet tooth days!
Storage and Reheating
These waffles keep well in the refrigerator for about 2-3 days. Just be sure to store them in an airtight container to keep them fresh.
Reheating Tip: For the ultimate crispy goodness, pop them in the toaster or toaster oven when you’re ready to enjoy again. You could also microwave them if you’re in a hurry, but the toaster is always better if you want them fluffy and warm!
Freezer-Friendly: Yes, absolutely! Once they’ve cooled completely, stack the waffles between sheets of parchment paper, place them in a freezer bag, and shove them in the freezer. They’ll keep for about 2 months. Worth it!
And let’s face it, having a stash of homemade waffles ready at a moment’s notice? Total game changer!
FAQ
Can I use whole wheat flour instead of all-purpose flour?
Yes, you can! Just keep in mind the texture will be slightly denser, but it still works great.
What can I do with the sourdough discard if I don’t want to make waffles?
There are so many possibilities! You could try pancakes, sourdough pizza crust, or even sourdough crackers. It’s all about playing around with it!
Can I freeze the batter?
I wouldn’t recommend freezing the batter, as the baking powder and baking soda won’t work the same once thawed. But you can always make the waffles and freeze them instead!
Making these Sourdough Discard Waffles has truly become a cherished part of my weekend routine. They bring everyone together, not just around the table but in the kitchen, too, with smiles and laughter filling the air. So whether you’re an experienced chef or just starting out, I promise this recipe will be a hit in your home! Enjoy your waffles, and remember, it’s not just food. It’s all about those little moments that make life delicious!
Sourdough Discard Waffles
Ingredients
Method
- Preheat your waffle iron to medium heat.
- In a mixing bowl, combine the sourdough discard, flour, sugar, baking powder, baking soda, and salt.
- In another bowl, whisk together your egg, milk, melted butter, and vanilla extract until smooth.
- Pour the wet ingredients into the dry ingredients and mix until just combined.
- Lightly grease the waffle iron if necessary.
- Pour about 1/2 cup of batter into the waffle iron.
- Close the waffle iron and cook according to manufacturer’s instructions until golden brown, usually about 5 minutes.
- Serve warm with toppings of your choice, such as fresh berries, syrup, or whipped cream.