
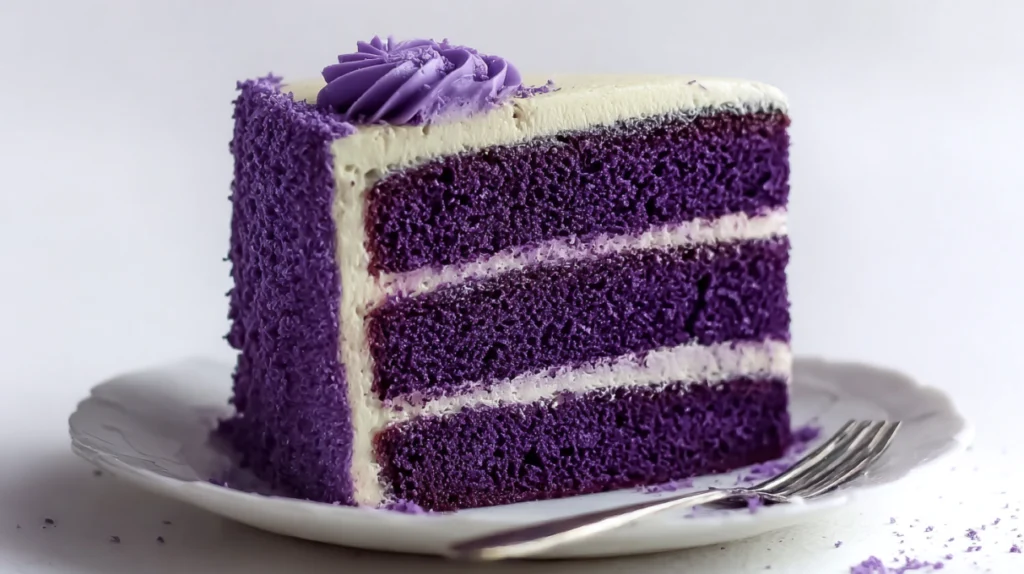
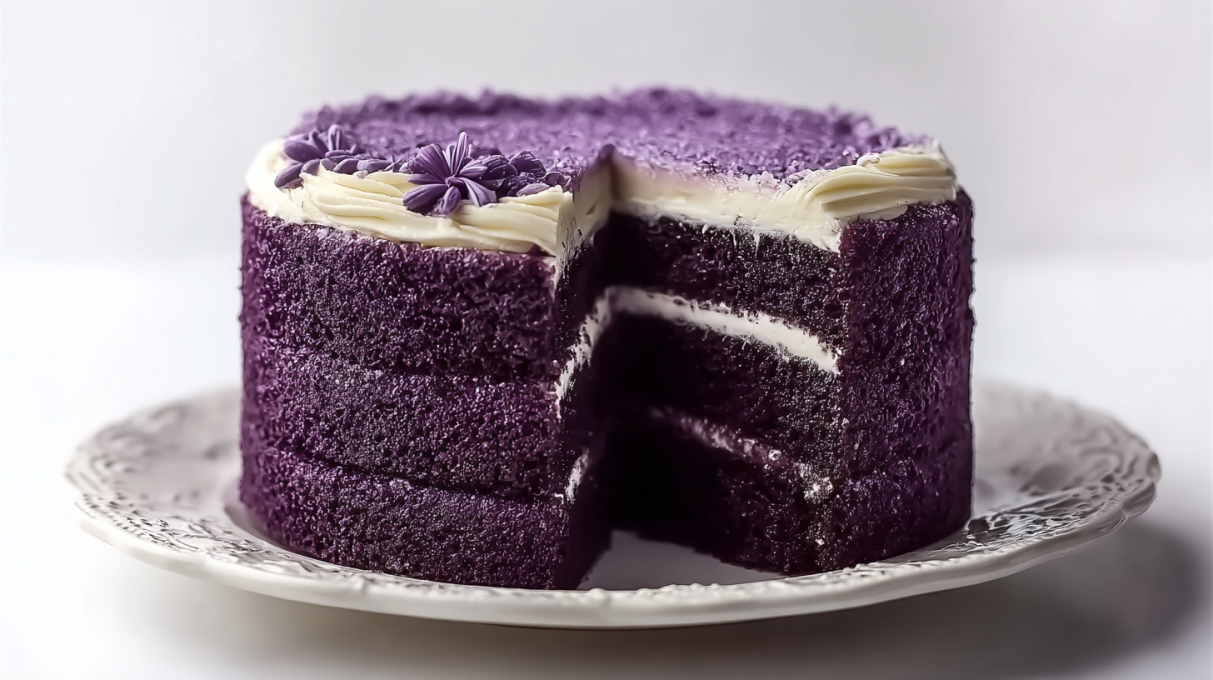
This Royal Purple Velvet Cake with Creamy Vanilla Frosting comes together in about 40 minutes and features a simple mixing method that will make it your go-to dessert for family gatherings and celebrations! This recipe is a total crowd-pleaser; your family will love its striking color and rich flavor!
Ingredient Breakdown
For the Cake
- 3 cups fine flour: This forms the base of your cake. Cake flour works beautifully for a lighter texture, but all-purpose flour will do just fine.
- 1 cup granulated sugar: Sweetening the deal! You can swap half of this for brown sugar for an added depth of flavor.
- 1⅓ cups buttermilk, at room temperature: For that lovely moistness! Don’t have any buttermilk? No worries! Just mix one cup of milk with a tablespoon of vinegar or lemon juice and let it sit for 5 minutes.
- ½ cup unsalted butter, softened: Always go for unsalted, it allows you to control the saltiness of your cake better.
- 4 large eggs, at room temperature: These help bind everything together and make your cake super fluffy.
- 2 heaping tablespoons unsweetened cocoa powder: Just enough to give that classic velvet flavor without overpowering the cake.
- 2 teaspoons pure vanilla extract: For that warm, comforting aroma.
- A dash of purple liquid food coloring: The star of the show! Depending on how vivid you want it, adjust accordingly.
- 1 teaspoon baking soda: This helps the cake rise.
- 1 teaspoon white vinegar: A perfect partner to the baking soda for a fluffy texture.
For the Frosting
- 8 ounces cream cheese, softened: This gives that creamy texture and tangy flavor.
- 8 ounces unsalted butter, softened: Use it to bring that lovely richness to the frosting.
- 2 cups powdered sugar: To sweeten and thicken your frosting!
- 2 teaspoons pure vanilla extract: Same as in the cake, for a deliciously aromatic finish.
How to Make This Royal Purple Velvet Cake
Step 1: Preheat the Oven
Start by preheating your oven to 350°F (175°C). Preparation is key here, this cake needs to bake right after mixing!
Step 2: Prepare Your Pans
Prepare two 9-inch round cake pans by greasing them lightly and dusting with flour. This will help the cakes slide right out!
Step 3: Mix Dry Ingredients
In a medium bowl, whisk together your flour and cocoa powder until well combined. This is going to be the dry mixture for the cake.
Step 4: Cream Butter and Sugar
In a large mixing bowl, beat the softened butter and granulated sugar with an electric mixer on medium speed for about 3 minutes until it’s light and fluffy. Seriously, it should be so fluffy that you could practically float on it!
Step 5: Add Eggs and Vanilla
Add the eggs one at a time, beating well after each addition. Then mix in the vanilla extract until combined. Take a moment to enjoy the aroma, it’s heavenly!
Step 6: Combine with Dry Ingredients
Gradually add the flour mixture to the creamed butter, alternating with the buttermilk. Start and end with the flour mixture. Stir just until everything is combined, no overmixing here!
Step 7: Add Food Coloring
Now’s the fun part! Add a dash of purple liquid food coloring to the batter and stir gently. Adjust to your desired shade! It should look vibrant and inviting.
Step 8: Mix Baking Soda and Vinegar
In a small bowl, mix the baking soda and vinegar. Watch it fizz! Quickly fold this mixture into the batter for a light, airy texture. You’ll see those bubbles!
Step 9: Prepare for Baking
Divide the batter evenly between the prepared cake pans. Use a spatula to level the tops out. Bake in the preheated oven for 25-30 minutes, or until a toothpick inserted in the center comes out clean. The smell will fill your kitchen, so mouthwatering!
Step 10: Cool the Cakes
Allow the cakes to cool in the pans for 10 minutes. Then transfer them to a wire rack to cool completely before frosting. Patience is a virtue, and trust me, it’s going to be so worth the wait!
Step 11: Make the Frosting
In a large bowl, beat the cream cheese and butter together until it’s smooth and creamy. Gradually add the powdered sugar, one cup at a time, beating until fluffy. Finally, stir in the vanilla extract. You’ll want to eat this with a spoon, so creamy and delicious!
Step 12: Frost the Cake
Alright, let’s assemble! Place one cake layer on a serving plate and spread a generous layer of frosting on top. Position the second cake layer over it and frost the top and sides evenly. Just like that, you have a masterpiece!
Step 13: Garnish
If you’re feeling fancy (and I always recommend it!), garnish with edible flowers, purple sugar sprinkles, or a dusting of cocoa powder for an elegant finish. Trust me, your guests will rave about it!
If you loved this royal purple velvet cake, be sure to check out my red velvet cookies with cream cheese frosting!
Why This Recipe Works
A Showstopper
This cake is perfect for any occasion! Whether it’s a birthday party or just a cozy family night, it’s sure to wow everyone.
Quick & Easy
While this cake might look fancy, believe me, it comes together all in about 40 minutes, Y’all! This quick and easy recipe makes it an ideal choice for busy weeknight dinners.
Customizable
Want to adjust the flavors? Maybe add a bit of mint? Or perhaps a rich chocolate ganache instead of the creamy vanilla frosting? You can use whatever ingredients you have; this recipe encourages creativity!
Budget-Friendly
All you need are everyday ingredients. No fancy stuff here! It makes it easy on your wallet while satisfying your craving for something special.
Deliciously Moist
Thanks to the combination of buttermilk and the careful folding of ingredients, this cake is loaded with tons of flavor and moisture. Seriously, it’s melt-in-your-mouth good!
Serving and Storage Tips
How to Serve This Cake
This cake is fantastic on its own and perfect for sharing at gatherings or celebrations. Consider pairing it with a scoop of vanilla ice cream or some fresh berries on the side for an extra treat.
Storage
Leftovers (if there are any!) can be stored in an airtight container in the refrigerator for up to 3 days. Although, let’s be real, there’s a good chance it won’t last that long!
Reheating Instructions
Best enjoyed chilled, but if you want to warm it slightly, pop a piece in the microwave for about 10-15 seconds. Just enough to take the chill off, but not so much that it falls apart.
Freezer Friendly
Yes! You can freeze the unfrosted cake layers for up to 3 months. Just wrap them tightly in plastic wrap and store in a freezer-safe bag or container. When you’re ready to enjoy, let them thaw in the fridge overnight, then frost as usual.
Food is all about bringing people together, and this Royal Purple Velvet Cake does just that. I know you’re going to fall in love with it just like my family has! So go ahead, make it for your next occasion, or, let’s be honest, just for yourself because you deserve it!
Remember, you’re in charge, make this recipe your own, and watch the smiles unfold! So, what are you waiting for?
Get into that kitchen and start baking! And follow us on Pinterest for daily meal inspiration!
Royal Purple Velvet Cake
Ingredients
Method
- Preheat the oven to 350°F (175°C).
- Grease and flour two 9-inch round cake pans.
- Whisk together flour and cocoa powder in a medium bowl.
- Beat butter and sugar in a large bowl until light and fluffy.
- Add eggs one at a time, beating well, then mix in vanilla.
- Alternate adding flour mixture and buttermilk, starting and ending with flour.
- Add food coloring gently to achieve desired vibrancy.
- Mix baking soda and vinegar in a small bowl, then fold into the batter.
- Divide batter evenly between the prepared pans.
- Bake for 25-30 minutes until a toothpick comes out clean.
- Cool in pans for 10 minutes, then transfer to a wire rack.
- Beat cream cheese and butter until smooth.
- Gradually add powdered sugar until fluffy, then stir in vanilla.
- Place one cake layer on a serving plate and frost the top.
- Add second layer and frost top and sides.
- Garnish as desired with edible flowers or sprinkles.