
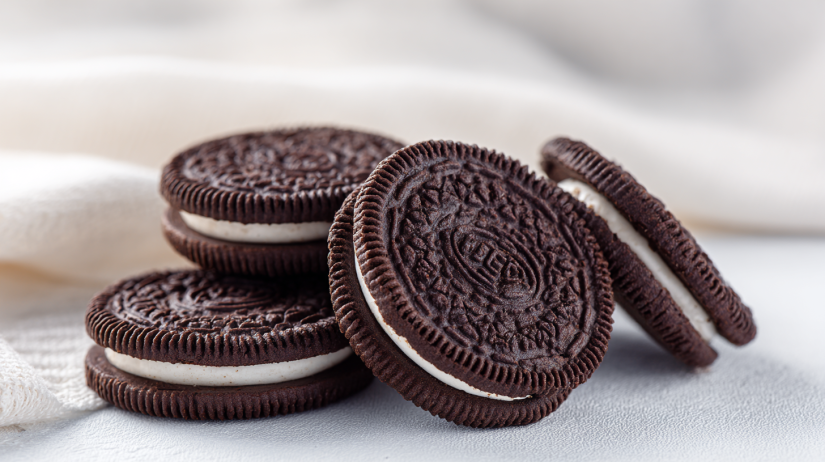
This homemade Oreo cookies recipe comes together in about 30 minutes and involves minimal cleanup for a drop-dead crowd-pleaser that your family will absolutely love! You can even switch up the fillings to suit your taste or use it as a ‘clean out the pantry’ project to get rid of those random bits and bobs you have hanging around!
Ingredient Breakdown
Let’s talk about what you’ll need for these fabulous cookies. Trust me, they’re super simple to whip up!
- 1 cup of cocoa powder
- 1 ½ cups of all-purpose flour
- 1 teaspoon of baking soda
- ½ teaspoon of salt
- 1 cup of unsalted butter (softened)
- 1 cup of granulated sugar
- ½ cup of brown sugar
- 1 large egg
- 1 teaspoon of vanilla extract
- 1 ½ cups of powdered sugar, with a splash of milk
Let’s Get Cooking!
Step-by-Step Instructions
Alright, friends, let’s jump into the fun part: making these cookies!
Preheat your oven to 350°F (175°C). The smell of these cookies baking will be heavenly, so you’ll want to get that oven preheated right away!
In a mixing bowl (I use a large one for this), combine 1 cup of cocoa powder, 1 ½ cups of all-purpose flour, 1 tsp of baking soda, and ½ tsp of salt. Whisk it all together until it’s smooth, this is your dry mixture. Set it aside for now.
In another bowl, cream together 1 cup of softened butter, 1 cup of granulated sugar, and ½ cup of brown sugar until fluffy. This will take about 2-3 minutes. The best part is watching the butter turn from yellow to a creamy white!
Add in 1 large egg and 1 tsp of vanilla extract, mixing until everything is well combined. You know it’s ready when it looks nice and shiny!
Gradually add the dry mixture to the wet ingredients, stirring until fully incorporated. You’ll need some arm strength here, or you can use a hand mixer if that’s easier. The dough will start to come together and smell absolutely divine!
Now, roll the dough into small balls (about 1 inch in diameter) and flatten them slightly. Place them on a baking sheet lined with parchment paper, this helps with cleanup later!
Bake for 8-10 minutes until the edges are set but the center is still soft. Your kitchen should smell like a chocolate paradise right about now!
Once they are out of the oven, cool the cookies on a wire rack for at least 10 minutes. Resist the urge to just dive right in!
For the filling, mix together 1 ½ cups of powdered sugar, a splash of milk, and any additional flavorings you want until it’s smooth and creamy.
Spread the filling on half of the cooled cookies and carefully top them with the remaining cookies. Press gently to make the “Oreo” sandwiches.
Now just sit back and enjoy your homemade Oreo cookies! Trust me, they’re going to disappear fast!
Why I Love This Recipe
This is my go-to recipe when I want to make something special without spending forever in the kitchen. I’m a real sucker for classic comfort food, and oreos definitely fit the bill! The best part is that you can use whatever you’ve got on hand, swap the fillings, change up the flavors, it’s all fair game!
Honestly? I can’t keep these around for long because they always get devoured! Last week, I made a batch for my nieces and nephews, and they went back for seconds and thirds, just the best kind of chaos!
If You Loved This Recipe, be sure to check out my Mini Pizza Crackers, my Gelatin Gummy Bears, or my Peanut Butter Banana Bites!
Why This Recipe Works
Quick & Easy
Only takes about 30 minutes from start to finish!
Boss of Comfort Food
These cookies are loaded with tons of flavor that hits all the right spots, making them an absolute treat for anyone who bites into one. They’re a total win for family gatherings or just a cozy night at home!
Make-Ahead Friendly
You can whip up the dough a day ahead and store it in the fridge. Just pop it in the oven when you’re ready for that fresh-baked goodness. Trust me, it’s going to make your life easier!
Customizable
The secret to a delicious Oreo is in the filling! Feel free to adjust the flavor to your heart’s content. Want mint filling? Go for it! Or maybe a peanut butter twist? Yes, please!
Budget-Friendly
Using affordable, everyday ingredients means you won’t break the bank. You probably already have most of these items in your pantry!
Serving Suggestions and Storage
How to Serve This Recipe
These homemade Oreo cookies are perfect for dunking in a glass of milk or serving with a scoop of vanilla ice cream. They make for a delightful dessert any night of the week!
Storage
These cookies will keep well in an airtight container in the refrigerator for about a week, if they last that long! Just make sure they’re completely cool before you store them to keep from getting soggy.
Reheating Instructions
To reheat, pop them in the microwave for about 10-15 seconds. This makes the cream filling a little gooey and oh-so-tasty!
Freezer-Friendly
Absolutely! You can freeze the cookies for up to 3 months. Just place them in a freezer bag or airtight container. When you’re ready to enjoy, let them thaw at room temperature, or pop them in the microwave for a quick warm-up!
And wait! Before I forget, don’t feel bad about experimenting with fillings here. You could throw in some crushed Oreos into the cream filling or even try some flavored extracts. Seriously, just have fun with it!
There you have it! Your very own quick and easy homemade Oreo cookies that are bound to become a household favorite. Happy baking, my friends! Follow us on Pinterest for daily meal inspiration!

Homemade Oreo Cookies
Ingredients
Method
- Preheat your oven to 350°F (175°C).
- In a mixing bowl, combine cocoa powder, all-purpose flour, baking soda, and salt. Whisk until smooth and set aside.
- In another bowl, cream together softened butter, granulated sugar, and brown sugar until fluffy, about 2-3 minutes.
- Add the egg and vanilla extract to the creamed mixture, mixing until well combined.
- Gradually add the dry mixture to the wet ingredients, stirring until fully incorporated.
- Roll the dough into small balls (about 1 inch in diameter) and flatten slightly before placing them on a lined baking sheet.
- Bake for 8-10 minutes, until the edges are set but the centers are still soft.
- Cool the cookies on a wire rack for at least 10 minutes.
- Mix powdered sugar with a splash of milk and any desired flavorings until smooth.
- Spread the filling on half of the cooled cookies and top with the remaining cookies to make ‘Oreo’ sandwiches.