
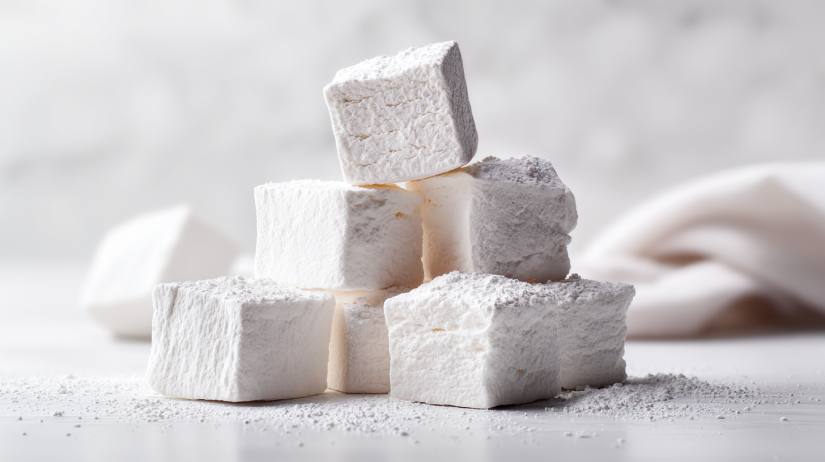
This Homemade Healthy Marshmallows (no corn syrup!) comes together in about 30 minutes and is made all in one pot, which means minimal cleanup for a quick and easy dessert your family will love! You can switch up the flavors or mix-ins to suit your taste or just use whatever you have hanging around, perfect for cleaning out your pantry. Really, it’s all about making those sweet memories with your loved ones, right?
Ingredient Breakdown
- 1 Cup Filtered Water, Divided
- 3 Tablespoons Grass-Fed Gelatin
- 1 Cup Light Colored Honey
- ¼ Vanilla Powder (Optional)
- A Pinch of Sea Salt
- 2 Tablespoons Arrowroot Powder
How to Make Homemade Healthy Marshmallows
Step 1: Bloom the Gelatin
Okay, first things first! Prepare a 9×13-inch pan by lining it with parchment paper in both directions, letting the sides hang over for easy removal later. Dust the bottom lightly with arrowroot powder. Set it aside.
Now, in the bowl of your stand mixer, add ½ cup of filtered water and sprinkle the gelatin over the water. Give it a quick whisk to combine, and then let it sit for about 5 minutes. This is called “blooming,” and it’s essential for getting that perfect fluffy texture!
Step 2: Heat the Honey Mixture
In a thick-bottom saucepan (seriously, this is key to avoid burning!) combine the remaining ½ cup of water, honey, and a pinch of sea salt. Bring it to a simmer on high heat, then reduce the heat to medium.
Let it simmer over medium-high heat for approximately 15 minutes, you want it to reach the soft-ball stage at 240°F (use a candy thermometer!). Keep an eye on it and make sure it’s gently bubbling, not boiling over. Watch closely! If it starts to rise up, lower the heat just a smidge and keep it simmering.
Step 3: Combine Honey and Gelatin
Once your honey mixture is at the right temperature, it’s time to combine it with the gelatin! Assemble your stand mixer with a whisk attachment and make sure that bowl with the bloomed gelatin is positioned and ready.
With the mixer on low, slowly pour that hot honey mixture into the bowl in a thin stream for about 90 seconds. This gradual pouring is super important! You want to avoid clumping the gelatin.
Step 4: Whip It Good!
After you’ve added all the honey mixture, you can turn the mixer to high. Whip everything together until it gets fluffy, this takes about 8 minutes. You’re looking for it to increase in volume and form stiff peaks! Feel free to add your vanilla powder for that extra flavor in the last minute of whipping.
Step 5: Set the Marshmallow Fluff
Now comes the fun part, transfer that cavernous marshmallow fluff to your prepared pan! Use a spatula (a metal icing spatula works wonders) to spread it evenly across. Let it set at room temperature for at least 4 hours, but if you can, overnight is best for ultimate fluffiness.
Step 6: Cut and Coat
This is the moment you’ve been waiting for! Dust the top with more arrowroot powder. Lift the marshmallow out of the pan using those parchment overhangs and onto a cutting board.
Carefully peel off any parchment stuck to the edges and coat the edges with more arrowroot. You’ll want to flip the marshmallow over and sprinkle the bottom side again to ensure they’re nice and non-stick.
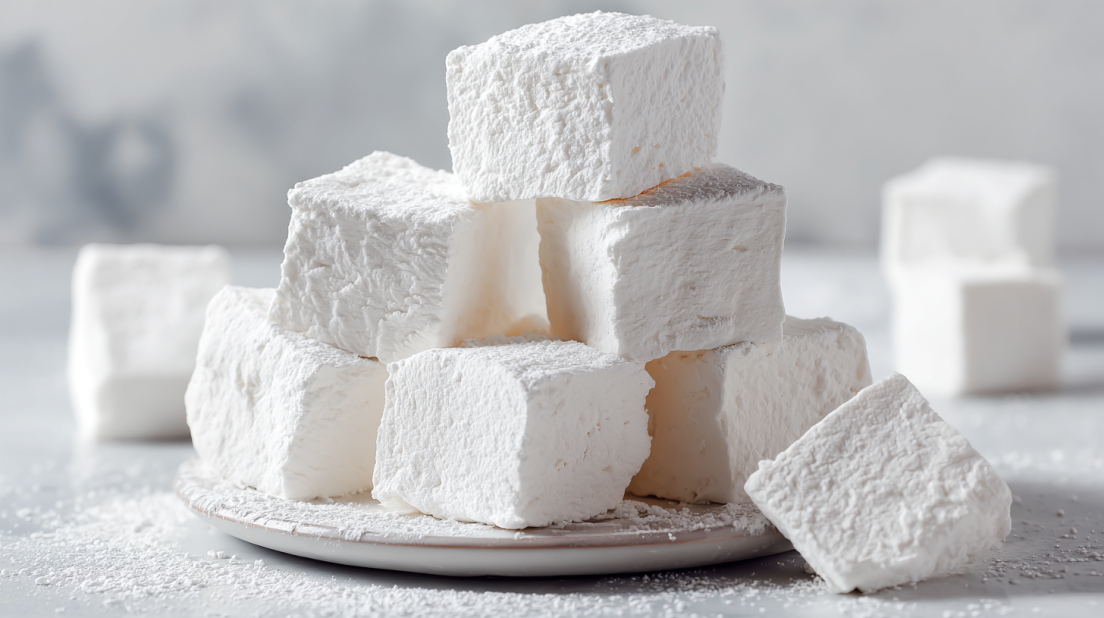
Cut into your desired sizes, a sharp knife works best for this! Toss all your pieces in more loose arrowroot powder to keep them from sticking together, and there you go, beautiful marshmallows ready for devouring!
Why I Love This Recipe
So, I just have to say this is my go-to recipe when I want something that feels like a treat but is actually kind of healthy. I’m a real sucker for homemade goodies, and the best part is. I can control the ingredients myself! No corn syrup, no weird chemicals, just pure, wholesome marshmallows. Plus, you can play around with flavors, mix-ins, or whatever you have on hand, making this not just a treat but a family project! Honestly, every time I make these, my kids can’t get enough. It’s the best feeling when they ask for seconds or even thirds.
If you loved this recipe, be sure to check out my Homemade Gogurts, my Peanut Butter Banana Bites, or my Chocolate Spinach Muffins!
Why This Recipe Works
Quick & Easy
This recipe comes together in under 30 minutes with just a little bit of waiting time. That’s right, your kids can help out too! Making marshmallows at home sounds complicated, but trust me, it’s super simple and provides a great bonding experience!
Budget-Friendly
A homemade treat using accessible ingredients? Yes, please! All of these ingredients are items you likely already have in your pantry, making it one of the best ways to satisfy that sweet tooth without breaking the bank.
Crowd-Pleaser
The whole family will love these marshmallows! Whether you’re making s’mores for a cozy campfire night or just enjoying them plain, they’re bound to bring smiles all around. Even those picky eaters can’t resist a fluffy, sweet treat!
Customizable
Feel free to get creative! Add in cocoa powder for chocolatey marshmallows, or mix in some crushed peppermint for a holiday vibe. The opportunities are endless, making this a versatile treat that never gets old.
Make-Ahead Friendly
These marshmallows can be made ahead for a party or just to have on hand for a sweet snack. Plus, they can be wrapped and set aside for later enjoyment. Honestly, preparing them feels like I’m setting up magic for future dessert moments.
Serving and Storage Tips
Serving Suggestions
There’s so much you can do with these homemade healthy marshmallows! Enjoy them plain, toss them into hot cocoa for a comforting drink, or make s’mores. You can even use them as toppings on brownies or cupcakes for that extra touch!
Storage
Store your homemade marshmallows in an airtight container for up to 2 weeks. Just ensure they are coated in arrowroot powder to keep them from sticking together, and you’re good to go!
Reheating Instructions
These marshmallows are best enjoyed fresh, but if you want to use them for s’mores, stick one in the microwave for about 10-15 seconds to get that gooey goodness back.
Freezer Friendly
Yes, you can freeze these too! Layer pieces parchment paper between them, and place in a freezer-safe bag. They’ll keep well for up to 2 months. Just let them sit at room temperature to thaw before enjoying!
So, there you have it, the ultimate guide to making your very own Homemade Healthy Marshmallows (No Corn Syrup!)! You might have initially thought it was a complex process, but now you see how quick and easy it actually is. Happy cooking, friends! Follow us on Pinterest for daily meal inspiration!
Homemade Healthy Marshmallows
Ingredients
Method
- Prepare a 9×13-inch pan by lining it with parchment paper, and dust the bottom lightly with arrowroot powder.
- In the bowl of your stand mixer, add ½ cup of filtered water and sprinkle the gelatin over the water. Let it sit for about 5 minutes.
- In a thick-bottom saucepan, combine the remaining ½ cup of water, honey, and a pinch of sea salt.
- Bring to a simmer on high heat, then reduce to medium and let it simmer for approximately 15 minutes until it reaches the soft-ball stage at 240°F.
- Slowly pour the hot honey mixture into the bowl with the bloomed gelatin in a thin stream with the mixer on low.
- After adding all the honey mixture, turn the mixer to high and whip until fluffy, about 8 minutes.
- Add the vanilla powder during the last minute of whipping.
- Transfer the marshmallow fluff to the prepared pan and spread it evenly.
- Let it set at room temperature for at least 4 hours or overnight.
- Dust the top with more arrowroot powder, lift marshmallow out using parchment overhangs, and cut into desired sizes.
- Coat pieces in loose arrowroot powder to prevent sticking.