
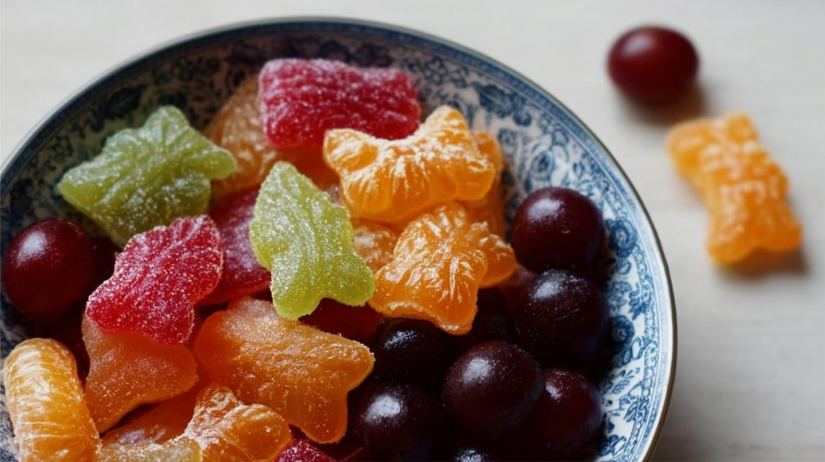
This Homemade Fruit Snacks recipe comes together in about 8 hours (not all of it active time, I promise!) using a dehydrator or oven. It’s such a fun way to make a easy snack that your family will love! Plus, you can easily switch up the ingredients based on whatever fruits and veggies are hanging out in your fridge. You know, a little clean-up doesn’t hurt! So, let’s dive into how to whip up these fruity delights!
Ingredient Breakdown
- 1 cup of Pureed Fruit
- 1/2 cup of Vegetable Puree
- 2 tablespoons of Honey or Maple Syrup
- 1 tablespoon of Lemon Juice
- 1 tablespoon of Gelatin (or plant-based alternative)
- Optional: Spices (Cinnamon or Vanilla Extract)
How to Make Homemade Fruit Snacks
Step 1: Preheat
First things first, preheat your oven to 170°F (75°C) or set up your dehydrator. (No stress. I promise your kitchen will smell lovely while this all comes together!)
Step 2: Mix It Up
In a mixing bowl, combine the fruit puree, vegetable puree, honey (or maple syrup), lemon juice, and any spices you’re using. Mix it well until everything looks beautifully blended! This is where it starts getting refreshing!
Step 3: Prep the Gelatin
If using gelatin, dissolve it in a small amount of water according to the package instructions, then add it to the mixture and blend it in. This adds a nice, chewy quality to your snacks!
Step 4: Spread It Out
Next, pour your mixture onto a silicone baking mat or parchment paper. Spread it into an even layer about 1/4-inch thick. It should resemble a fruity pancake!
Step 5: Dehydrate
Pop it in the oven or dehydrator and let it dry out for about 6-8 hours. Just check it periodically! You’ll know it’s ready when it’s no longer sticky to the touch.
Step 6: Slice It Up
Once your fruit sheet has dried, now comes the fun part, cutting it into shapes or sizes that suit your fancy! Round, triangles, or just simple squares, the world is your oyster!
Step 7: Store Away
Store your delicious treats in an airtight container. They should stay good for about 1-2 weeks if they last that long, which, who are we kidding, they probably won’t!
Why I Love This Recipe
This is my go-to recipe when I’m looking for a healthy yet comforting snack that my family can munch on guilt-free! I mean, honestly, who doesn’t love a fruit snack? And I’m a real sucker for knowing exactly what goes into snacks! The best part is, you can use whatever you’ve got on hand, from leftover fruit in the fridge to those veggies that need to be used up. It’s so versatile, and every time I make them, I find myself experimenting with different flavors!
If you loved this recipe, be sure to check out my Homemade Oreo Cookies, my Mini Pizza Crackers, or my Homemade Fruit Roll-Ups!
Why This Recipe Works
Quick & Easy
This recipe comes together all in one bowl and requires minimal hands-on time. Seriously! Once prepped, you can just let the oven or dehydrator do its thing.
Budget-Friendly
Uses affordable, everyday ingredients that you likely already have in your pantry or fridge. It’s a total win for saving some bucks while keeping the kids happy!
Customizable
The possibilities are endless! You can create someone different every time you make it, which makes it exciting for kids and adults alike. Change up the fruits and veggies to suit what you have on hand!
Make-Ahead Friendly
These fruit snacks are perfect for meal prep! Make a big batch, and you’ve got tasty snacks for the week ahead. Great for road trips, lunch boxes, or just snacking around the house!
A Crowd-Pleaser
The whole family will love this snacking experience! They’re fun to make and even more fun to eat. And, trust me, you’ll hear fewer complaints about snacks from the kiddos!
Serving and Storage Tips
How to Serve This
These are great on their own, but why not get creative? Pair them with some yogurt for a fruity parfait or crumble them over oatmeal for breakfast. They can also be a fun addition to a charcuterie board!
Storage
These homemade fruit snacks last around 1-2 weeks in an airtight container at room temperature or can be stored in the fridge for longer freshness.
Reheating Instructions
Reheating isn’t really the norm for fruit snacks, but if you want to soften them, just let them sit at room temperature for a bit before enjoying.
Freezer Friendly?
Yes! These snacks can be frozen for up to 3 months. Just make sure to place parchment paper between layers if you stack them for easier separation later!
There you have it, my friend! A wonderfully simple recipe for homemade fruit snacks that’s utterly delicious and packed with nutritious benefits. These snacks really are perfect for busy weeks, after-school treats, or any time you or your kiddos need a wholesome pick-me-up. Happy snacking! Follow us on Pinterest for daily meal inspiration!

Homemade Fruit Snacks
Ingredients
Method
- Preheat your oven to 170°F (75°C) or set up your dehydrator.
- In a mixing bowl, combine fruit puree, vegetable puree, honey (or maple syrup), lemon juice, and any spices you’re using. Mix well until beautifully blended.
- If using gelatin, dissolve it in a small amount of water according to package instructions, then add it to the mixture and blend well.
- Pour the mixture onto a silicone baking mat or parchment paper and spread it into an even layer about 1/4-inch thick.
- Dehydrate in the oven or dehydrator for about 6-8 hours, checking periodically until it’s no longer sticky.
- Once dried, cut the fruit sheet into your desired shapes or sizes.
- Store the treats in an airtight container. They should stay good for about 1-2 weeks.