
This Homemade Fruit Roll-Ups comes together in about 30 minutes and is a no-bake treat that your family will love! Switch up the fruit varieties to suit your taste or use it as a ‘clean out the fridge’ meal to get rid of those berries that are about to turn! Trust me; this fun little project is both a delight and a healthy snack option that everyone will enjoy.
Ingredient Breakdown
- Berries – 5 cups
- Honey – 1/4 cup
- Lemon Juice – 2 tbsp
Let’s Get Cooking!
Now that we have our ingredients ready, let’s dive into the fun part! Grab those berries, and let’s turn them into fruit leather!
Preheat your oven to 170 degrees Fahrenheit (or the lowest temperature your oven will achieve). This low and slow method will help to dry the fruit mixture without cooking it much.
Prep your baking pan: Line a large (17×12 inch) rimmed baking pan with parchment paper or a silicone baking mat. This is crucial to prevent sticking, trust me, you don’t want your fruit roll-ups to end up all gooey and stuck to your pan!
Rinse and prep the berries: Give your berries a good rinse and remove any stems or bad spots. Honestly, this part is so simple and they smell so fresh!
In your blender or food processor, add the berries directly, followed by the honey and lemon juice. Blend until smooth about 1-2 minutes should do it! You’re going for a silky texture, and the color is just stunning!
Optional, but worth it if you prefer a smooth finish, pour the fruit puree through a fine mesh strainer to remove any seeds. Just be gentle, and use a spatula to push the mixture through. This may sound like a hassle, but it’s totally worth it if you want that perfect roll-up texture.
Pour the pureed fruit onto your prepared baking sheet and spread it evenly over the entire pan. Use a spatula to get the edges nice and smooth. You want it about 1/8-1/4 inch thick for the best results.
Bake for 5-6 hours yes, it’s a long time, but think of all those delicious aromas wafting through your house! Be sure to check at the halfway point and rotate the pan so it dries evenly.
Remove from the oven when the puree has set and is no longer sticky. You’ll know it’s done when you can touch the surface lightly and it doesn’t stick to your fingers.
Allow the pan to cool completely. If you used a silicone baking mat, gently peel off the cooled fruit leather and transfer it onto a large sheet of wax paper.
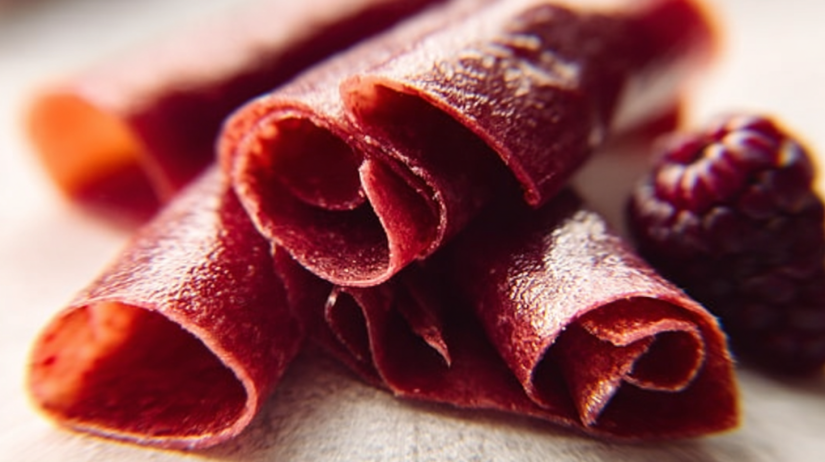
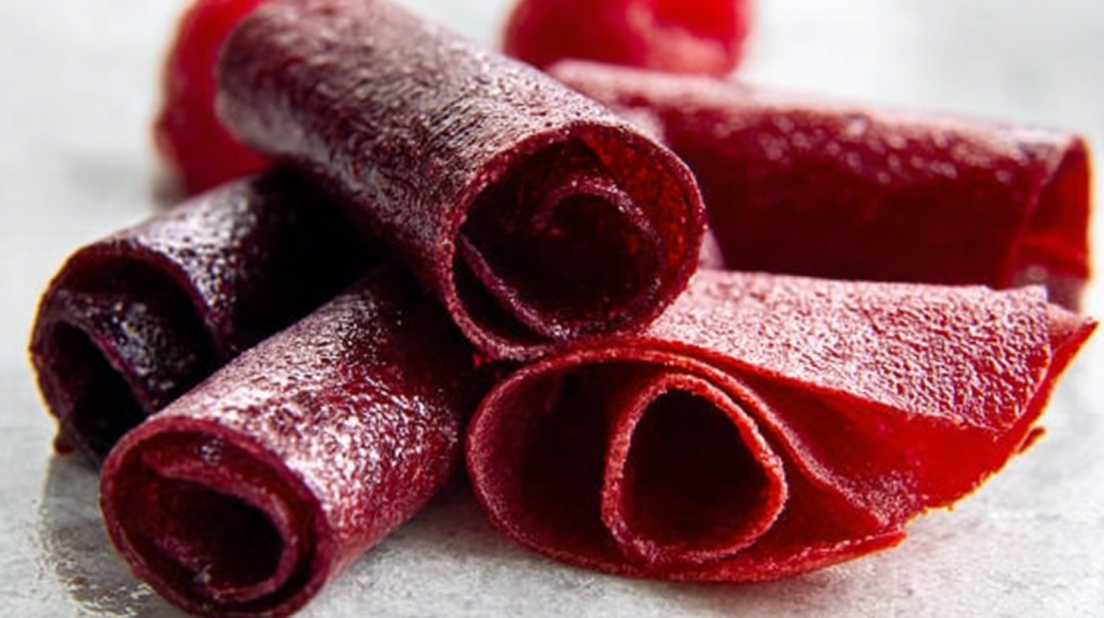
Cut the paper-lined fruit leather into long strips and roll them up. You can also use a pizza cutter for this, it’ll save time and give you perfect strips.
Store the fruit roll-ups in an airtight container for up to 2 weeks. If your kids love them as much as mine do, they won’t last that long!
Personal Connection to Homemade Fruit Roll-Ups
This is my go-to recipe when I’m looking for some healthy snacks to keep around the house. I’m a real sucker for anything fruity, especially when it’s jam-packed with nutrition and flavor. Plus, there’s something quite delightful in reaching for a snack that I made with my own two hands! My kiddos devour these, and I love that I can customize them based on what’s in season or what’s hanging out in my fridge. The best part is, they are perfect for after school or even on road trips, it’s a win-win!
If you loved this fruit roll-up recipe, be sure to check out my Yogurt Covered Blueberries, my Gelatin Gummy Bears, or my Homemade Healthy Marshmallows!
Why This Recipe Works
Quick & Easy
This fruit roll-up recipe comes together in under 30 minutes, and then it’s just a waiting game while they dry out in the oven. Perfect for busy weekends when you want to whip up something fun!
Make-Ahead Friendly
These homemade fruit roll-ups are not only super simple, but they’re also perfect for meal prep. You can make a big batch, store them for a snack during the week, and they’ll always be there when the sweet cravings hit.
Customizable
Use whatever ingredients you have! Like I said earlier, mix and match your favorite berries or even add in some pureed apples or peaches. The entire family will love it because each roll-up can be uniquely tailored to your taste buds!
Budget-Friendly
Instead of buying those overpriced store-bought versions often loaded with artificial flavors, this recipe uses affordable, everyday ingredients. Plus, you know exactly what’s going into them and can control the sweetness!
Serving and Storage Tips
You can serve these homemade fruit roll-ups as a fun snack or even cut them into small strips for lunchboxes. They pair wonderfully with nut butter for added protein and healthy fats, so good!
Storage: Keep them in an airtight container at room temperature for up to 2 weeks, or pop them in the fridge if you want them to last even longer.
Reheating: No need for reheating here! These roll-ups are best enjoyed at room temperature or slightly chilled.
Freezing: Yes, you can freeze these fruit roll-ups! Just lay them flat in an airtight container, making sure to separate layers with wax paper. They can last for up to 3 months in the freezer! Just thaw them out when you’re ready to enjoy.
So, if you’re looking for a fun and easy way to get your kids excited about snacking, and something they’ll absolutely love, try these homemade fruit roll-ups! You’ll be the superstar of the kitchen, I promise!
You guys… Trust me when I say this is the best way to use up berries that might get neglected in the back of your fridge! My family can’t get enough of these, and I bet yours won’t be able to either! Enjoy! Follow us on Pinterest for daily meal inspiration!
Homemade Fruit Roll-Ups
Ingredients
Method
- Preheat your oven to 170 degrees Fahrenheit (or the lowest temperature your oven will achieve).
- Line a large (17×12 inch) rimmed baking pan with parchment paper or a silicone baking mat.
- Rinse the berries and remove any stems or bad spots.
- In a blender or food processor, combine the berries, honey, and lemon juice. Blend until smooth, about 1-2 minutes.
- Optional: Pour the pureed fruit through a fine mesh strainer to remove any seeds.
- Spread the pureed fruit evenly over the baking sheet, about 1/8-1/4 inch thick.
- Bake for 5-6 hours, checking at the halfway point and rotating the pan for even drying.
- Remove from the oven when the puree has set and is no longer sticky. Let it cool completely.
- If using a silicone mat, gently peel off the cooled fruit leather and transfer it onto wax paper.
- Cut the fruit leather into long strips and roll them up.
- Store the fruit roll-ups in an airtight container for up to 2 weeks.