
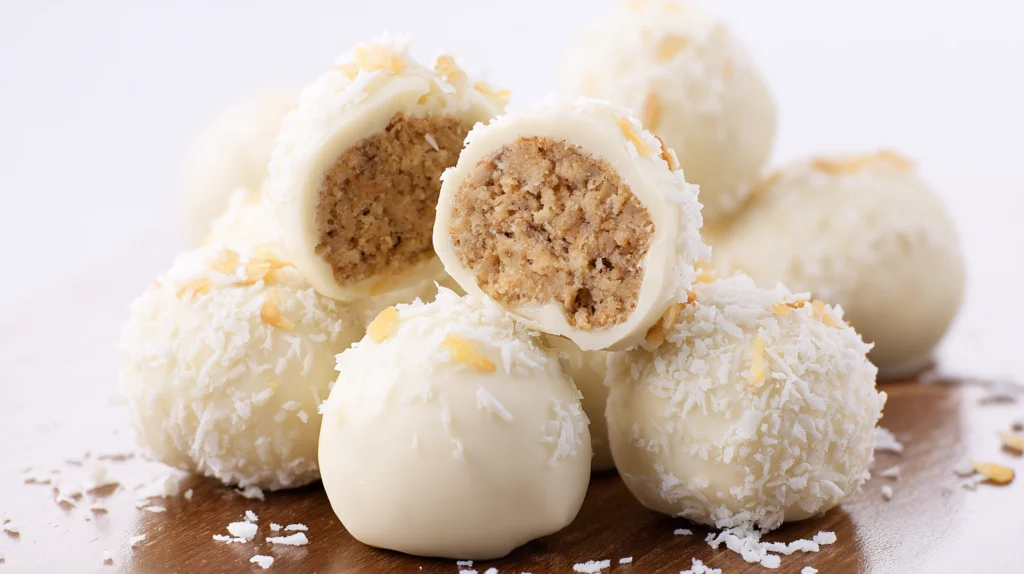
This delightful Banana Truffles recipe comes together in about 30 minutes and requires no baking for a quick and easy dessert that your family will adore! The best part is that these truffles are a fun project to do with kids, perfect for those busy weekend afternoons or as an after-dinner treat.
Ingredients Breakdown
Let’s dive into what you need to create these scrumptious Banana Truffles:
- 15.25 oz box of white cake mix (heat-treated; see notes for more details)
- 8 oz block of cream cheese (softened to room temperature for that creamy texture)
- 1 teaspoon vanilla extract (because vanilla makes everything better!)
- ½ cup crushed pineapple (very well drained, trust me, no one wants soggy truffles!)
- ¾ cup chopped walnuts (you can also use almonds or pecans if you prefer)
- 1 ripe banana (sliced, it’s banana truffles after all!)
- 8 oz of white candy coating (this gives it that sweet, sugary shell)
- ½ cup chocolate melting wafers (to drizzle on top)
- Rainbow sprinkles (for fun, of course!)
- Stemmed maraschino cherries (for that classic truffle finish)
How to Make Banana Truffles
Let’s get cooking! Follow these easy steps to whip up your Banana Truffles:
Prepare Your Work Area: Start by lining a large cookie sheet with parchment paper and set that aside. This is where the magic will happen!
Make the Truffle Mixture: In a medium-sized mixing bowl, cream together the cake mix, softened cream cheese, and vanilla extract until fully combined and the mixture is “dough-like,” which usually takes about 3-5 minutes. Don’t rush this step; you want it to be nice and smooth!
Add Remaining Ingredients: Stir in the crushed pineapple, chopped walnuts, and banana slices. Mix until all those yummy bits are equally distributed throughout. Feel free to taste it at this point, it’s like a tropical vacation in your mouth!
Roll Into Balls: Using a 1-2 inch cookie scoop, scoop the mixture and roll it into 1 to 1.5-inch balls. Use the palms of your hands to gently smooth and round out each ball. It’s a bit sticky, but that’s what makes them so fun to make!
Chill: Place each truffle ball onto the prepared parchment paper and pop it in the refrigerator to chill for about 1 hour. This step is essential for making sure they hold their shape.
Prep the Candy Coating: About 5-10 minutes before the chilling time is up, prepare your candy coating! Add your white candy coating to a microwave-safe bowl and heat it on 50% power for 1 minute. Stir it well, then return to the microwave for another 30-second burst at 50% power, stirring in between each interval until you achieve a silky smooth consistency.
Dip the Truffles: Using two forks or dipping tools (this can get a little messy!), dip each chilled truffle ball into the melted candy coating, covering it completely. Make sure to let the excess drip off before placing them back onto the parchment.
Cool Again: Place each coated truffle back onto the parchment paper and repeat the process until all truffles are coated. Then, return the baking sheet to the refrigerator to cool for about 30 minutes.
Chocolate Drizzle Time: When the truffles are nearly finished chilling, melt your chocolate wafers in the same way as the candy coating.
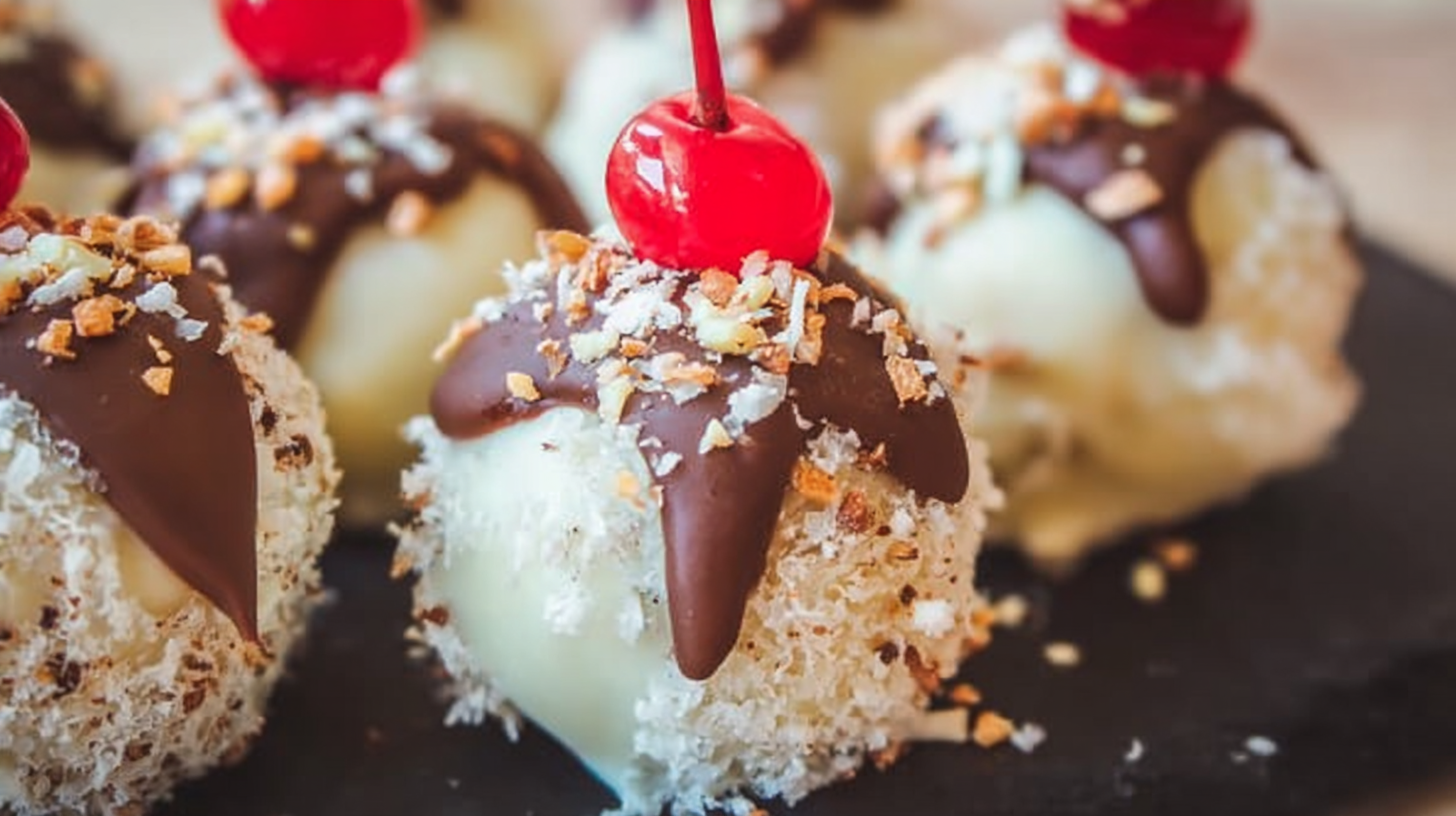
Fancy it Up: Use a small spoon to drizzle a dollop of the melted chocolate over the top of each truffle for that “chocolate syrup” look (you know, extra points for presentation!). While the chocolate is still warm, pop a stemmed cherry right on top and hold it gently for a few seconds to secure it.
Add Sprinkles: While the chocolate is still soft, sprinkle a few rainbow sprinkles on each truffle. Repeat for all truffles, working one at a time.
Final Chill: Return the sheet to the fridge and allow the truffles to chill for another 30 minutes before serving. And voilà! You’re ready to enjoy these sweet little bites!
If you loved these Banana Truffles, be sure to check out my Homemade Oreo Cookies or my best fun snack ideas!
Why This Recipe Works
Quick & Easy
Coming together in under 30 minutes, these truffles are the perfect quick dessert to whip up when you need something sweet in a dash. And like, who doesn’t want that?
Make-Ahead Friendly
These truffles can easily be made ahead of time, allowing you to save more time on busy days.
Customizable
Take advantage of the versatility! Use whatever nuts or fruit you have hanging out in the pantry. Can’t find bananas? Use apples or peaches instead!
Crowd-Pleaser
These little bites have tons of flavor and an adorable presentation, making them a definite hit at any gathering. Trust me, everyone is going to ask for seconds!
Serving & Storage Tips
How to Serve This Candy-Coated Treat
These Banana Truffles are fabulous on their own, but you can always serve them alongside fresh fruit or a scoop of vanilla ice cream for that extra “wow” factor! They make fabulous gifts as well, think neighborly snacks or cute party favors!
Storage
These truffles keep well in the refrigerator for up to a week. Just be sure to store them in an airtight container to maintain their freshness.
Reheating Instructions
Since these are a chilled treat, no need for reheating! Just take them out of the fridge a few minutes before serving to let them soften slightly, that’s the best way to enjoy them!
Freezer Friendly
Yes, these truffles are freezer-friendly! Just place them in a single layer in an airtight container, separating layers with parchment paper. They can be stored for up to 2 months. Simply let them thaw in the fridge overnight before serving.
There you have it, folks! These Banana Truffles are the cherry on top of a fun baking session spent with family and friends. Plus, they hit all the right notes: creamy, fruity, and sweet! Your family will love making and munching on these delicious little bites, and they can be customized to your heart’s desire.
Happy baking! And follow us on Pinterest for daily inspiration that brings warmth to your table!
Banana Truffles
Ingredients
Method
- Line a large cookie sheet with parchment paper and set aside.
- In a medium mixing bowl, cream together the cake mix, softened cream cheese, and vanilla extract until fully combined and the mixture is dough-like, about 3-5 minutes.
- Stir in crushed pineapple, chopped walnuts, and banana slices until evenly distributed.
- Using a 1-2 inch cookie scoop, form the mixture into 1 to 1.5-inch balls with your hands.
- Place the rolled balls onto the parchment-lined cookie sheet and chill in the refrigerator for about 1 hour.
- About 5-10 minutes before the chilling time is complete, prepare the candy coating by melting it in a microwave-safe bowl.
- Dip each chilled truffle into the melted candy coating, allowing excess to drip off before placing back on the parchment.
- Cool the coated truffles in the refrigerator for about 30 minutes.
- Melt the chocolate wafers and drizzle over each truffle while the melted coating is still warm.
- Top each truffle with a stemmed cherry and sprinkle with rainbow sprinkles before they set.
- Chill the truffles again for another 30 minutes before serving.