
This Strawberry Cheesecake Oreo Truffles comes together in about 30 minutes and is a no-bake dessert that your family will absolutely love! Seriously, these little bites of joy are perfect for a weeknight treat that won’t keep you slaving away in the kitchen!
Ingredients Breakdown
To whip up these amazing truffles, you’ll need just a few simple ingredients:
30 Gluten-Free Golden Oreos (1 12-ounce package)
Golden Oreos have that delicious vanilla flavor that pairs perfectly with the strawberry notes in the cheesecake truffles. If you don’t have gluten-free on hand, regular Oreos can certainly work for your family, as they’re considered vegan but do contain gluten!1 Cup Freeze-Dried Strawberries
Freeze-dried strawberries add that fresh, fruity flavor without the extra moisture, making them perfect for mixing into the creamy cheesecake filling. You can find these at health food stores or online. If you can’t find them, some fresh strawberries can do in a pinch, but be wary of added moisture in the mixture!3.5 Ounces Dairy-Free Cream Cheese
A key ingredient that gives these truffles their creamy texture. Brands like Tofutti or Kite Hill are my go-tos! It’s a total game-changer for those avoiding dairy.2 Cups Dairy-Free White Chocolate Chips
The star coating of these truffles! Make sure to choose dairy-free chips for a completely vegan experience. There are many brands out there that have great taste.Optional: A Couple Pinches of Salt
A pinch of salt will round out all those sweet flavors and create a beautifully balanced dessert.
Let’s Get Cooking!
Okay, let’s dive right into making these Strawberry Cheesecake Oreo Truffles. You’ll want to grab your food processor because it’s about to get wonderfully messy!
Crush the Cookies and Strawberries
Begin by adding the Golden Oreos and freeze-dried strawberries to your food processor. Pulse until you have a fine crumb mixture, which should take about 1-2 minutes. It should look sandy rather than chunky. Set aside 2 tablespoons of this mix for later use.Mix in Cream Cheese
Now, add your dairy-free cream cheese, cut into smaller cubes, into the food processor with your cookie crumbs. Pulse until everything is well combined and you have a large ball forming. (It’s okay if it’s a little sticky!). The mixture shouldn’t be crumbly; if it is, add in a spoonful of coconut milk to help it bind better.Shape the Truffles
Using about 1 tablespoon at a time, form small balls (this is the part where kids can really get involved and have fun!). Place them onto a tray that’s been sprayed lightly with cooking spray for easy removal later. Pop these in the freezer and let them chill for 30 minutes to an hour, trust me, this step is crucial for good dipping!Melt the Chocolate
Once your truffle balls are nice and firm, melt your dairy-free white chocolate chips in the microwave or on the stovetop using a double boiler. If using the microwave, heat in 30-second increments, stirring frequently, until melted and smooth.Dip the Truffles
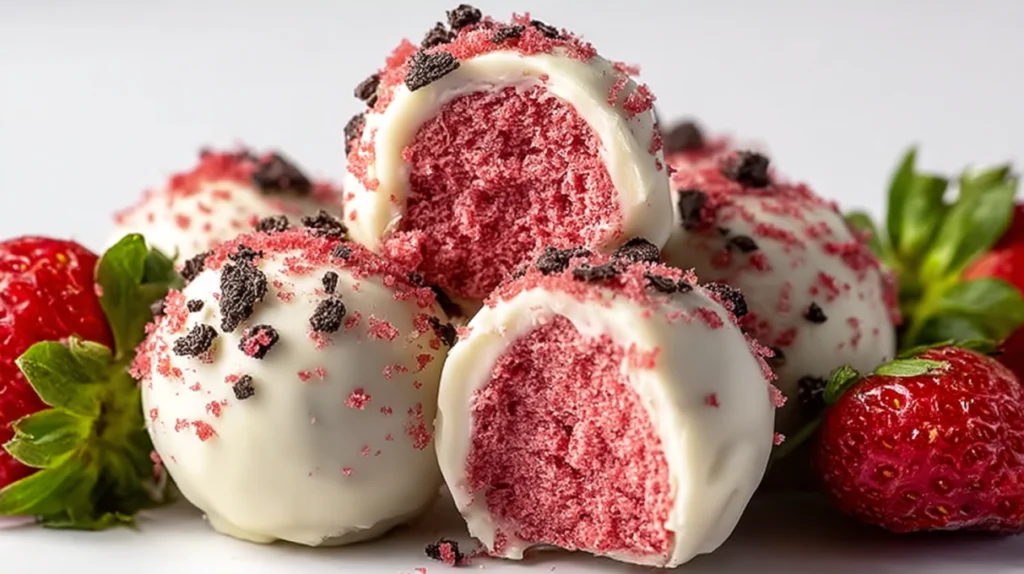
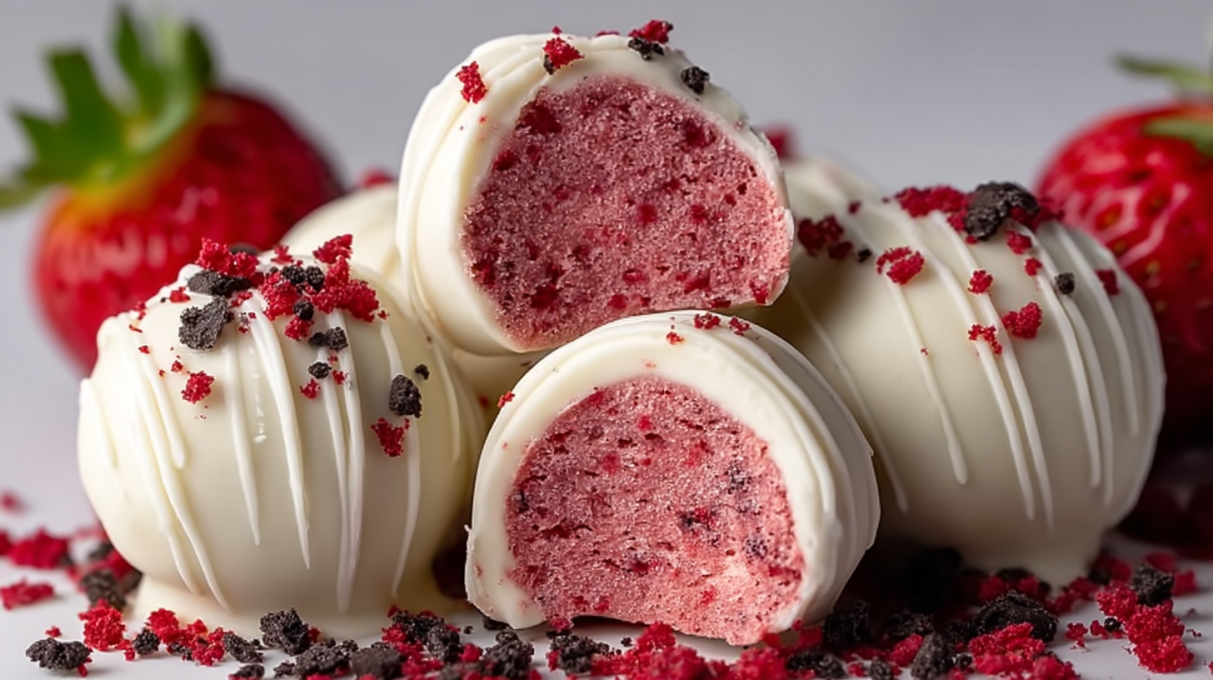
Now, here’s a little trick: use a toothpick to stab each frozen truffle ball to make dipping easier. Dip them in the melted chocolate, making sure they’re fully coated, and then place them back on the tray. You might want to drizzle the leftover chocolate over the top as well. Before the chocolate sets, sprinkle over your reserved cookie crumb mixture for that delightful finishing touch.Let It Set
Once you’ve dipped all your truffles, let them set at room temperature until the chocolate hardens. If you’re feeling impatient, pop them in the fridge for a quicker set!
These truffles can stay fresh on the counter for several days, but I like to keep mine in the fridge for up to 2 weeks, or you can freeze them for up to 3 months in an airtight container.
If you loved this dessert, be sure to check out my Salted Caramel Brown Sugar Pop Tart Cookie Bars or my Banana Truffles!
Why These Strawberry Cheesecake Oreo Truffles Work
Quick & Easy
This no-bake recipe comes together in under 30 minutes! Plus, with minimal prep work and no complicated techniques, it’s the perfect addition to your busy family weeknight routine.
Customizable
The beauty of these truffles is in their versatility. Not a fan of strawberries? Sub in raspberries or even mango! Got a nut allergy? Skip the toppings. You can really make these bites unique to your tastes, and whatever you have hanging out in the pantry!
Budget-Friendly
Using everyday ingredients like Oreo cookies and dairy-free chocolate means you won’t be breaking the budget for this indulgent dessert. It’s a win-win!
Make-Ahead Friendly
These beauties store well and taste even better after a day in the fridge. You can whip them up ahead of a party, holiday gathering, or just for a simple treat to keep the family happy all week long.
Comfort Food
There’s something about cheesecake flavors that brings back comforting childhood memories for me. These truffles are no different! They’re creamy, sweet, and just the right amount of indulgent. It’s an instant pick-me-up whenever you need a little something sweet!
Serving & Storage Tips
How to Serve This Dessert
These Strawberry Cheesecake Oreo Truffles are great on their own but can also be dressed up for special occasions! Try serving with fresh strawberries or even a drizzle of berry sauce for a burst of color and flavor. They’re also a fantastic addition to dessert platters.
Storage
Keep these truffles for up to 2 weeks in the fridge. Just make sure they’re in an airtight container. If you’ve made a big batch (which you should!), they also freeze well! Just pop them in a freezer-friendly container, and they’ll stay good for up to 3 months.
Reheating
Honestly, there’s no need to reheat these truffles! If you’ve kept them in the fridge or freezer, let them come to room temperature before serving, so the flavors pop once again.
Freezer Friendly
Yes, these truffles are freezer friendly! Just make sure they’re stored air-tight, and layer parchment paper between the truffles to avoid them sticking together.
So, whether you’re making these for a special occasion or just a normal Tuesday, I promise you, they’re a hit! Grab your ingredients, get your family involved, and enjoy making, eating, and sharing these super delicious bites. They truly embody the joy of home-cooked treats!
And follow us on Pinterest for daily baking inspiration that brings warmth to your table!
Strawberry Cheesecake Oreo Truffles
Ingredients
Method
- Begin by adding the Golden Oreos and freeze-dried strawberries to your food processor. Pulse until you have a fine crumb mixture, which should take about 1-2 minutes.
- Set aside 2 tablespoons of this mix for later use.
- Add your dairy-free cream cheese, cut into smaller cubes, into the food processor with your cookie crumbs. Pulse until well combined.
- Using about 1 tablespoon at a time, form small balls and place them onto a lightly greased tray. Chill in the freezer for 30 minutes to an hour.
- Melt the dairy-free white chocolate chips in the microwave or on the stovetop until smooth.
- Use a toothpick to dip each frozen truffle ball in the melted chocolate. Place them back on the tray and sprinkle with the reserved cookie crumb mix while the chocolate is still soft.
- Let them set at room temperature or speed up the process by placing them in the fridge.