
Remember when making glazed chicken meant standing over a hot stove, watching sauce burn to the pan while your kids impatiently asked “Is it ready yet?” After perfecting this honey mustard air fryer chicken through dozens of family dinners (and watching it become my daughter’s go-to birthday dinner request), I can promise you’ll get that perfect sweet-tangy glaze with tender, juicy chicken inside, no stovetop babysitting or complicated techniques required.
Essential Ingredients (Serves 4)
The Chicken:
- 4 boneless, skinless chicken breasts (6-8 oz each, about 1.5 pounds total)
- OR 8 chicken thighs (bone-in or boneless)
- 1 tablespoon olive oil (for moisture)
- Cooking spray for air fryer basket
Honey Mustard Glaze:
- ⅓ cup Dijon mustard (smooth, not grainy)
- ¼ cup honey (local honey works beautifully)
- 2 tablespoons whole grain mustard (for texture and tang)
- 1 tablespoon apple cider vinegar (balances sweetness)
- 1 teaspoon garlic powder
- ½ teaspoon paprika (adds color and mild flavor)
- ¼ teaspoon black pepper
- Pinch of cayenne pepper (optional, for subtle heat)
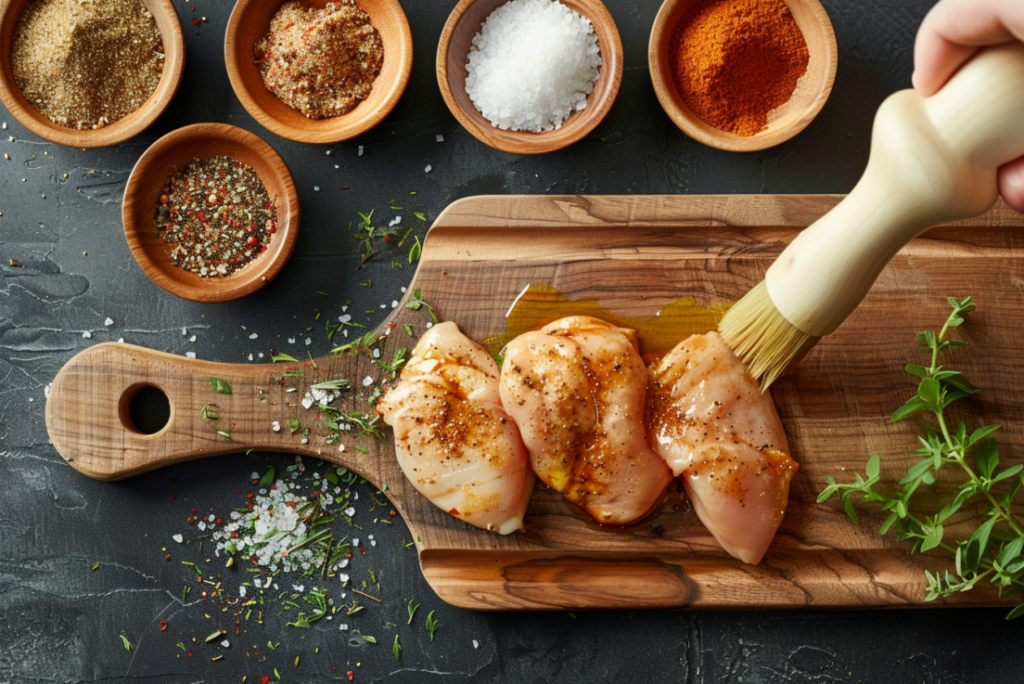
Base Seasoning for Chicken:
- 1 teaspoon salt
- ½ teaspoon garlic powder
- ½ teaspoon onion powder
- ¼ teaspoon black pepper
Optional Finishing Touches:
- 1 tablespoon fresh chopped parsley (for garnish)
- Extra honey for drizzling
- Sesame seeds (for visual appeal)

Pro tip: The combination of Dijon and whole grain mustard creates the perfect texture, smooth enough to coat evenly but with those satisfying mustard seed pops. Don’t skip the apple cider vinegar; it’s what keeps the glaze from being too sweet and adds that restaurant-quality balance.
Step-by-Step Air Fryer Method
Perfect Prep Work (10 minutes)
Prepare the Chicken:
- If using chicken breasts: Pound to even thickness (about ¾ inch) using meat mallet
- Remove chicken from refrigerator 15 minutes before cooking (even cooking)
- Pat completely dry with paper towels
- Trim any excess fat or irregular pieces
- If breasts are extra large (10+ oz), butterfly them for even cooking
Season the Chicken:
- In small bowl, mix salt, garlic powder, onion powder, and pepper
- Brush chicken lightly with olive oil on both sides
- Sprinkle seasoning mixture evenly over chicken
- Let sit while you prepare the glaze
Make the Honey Mustard Glaze:
- In medium bowl, whisk together both mustards thoroughly
- Add honey and whisk until smooth and combined
- Stir in apple cider vinegar, garlic powder, paprika, and pepper
- Taste and adjust: add more honey if too tangy, more vinegar if too sweet
- Set aside ⅓ of glaze in separate bowl for serving (food safety!)
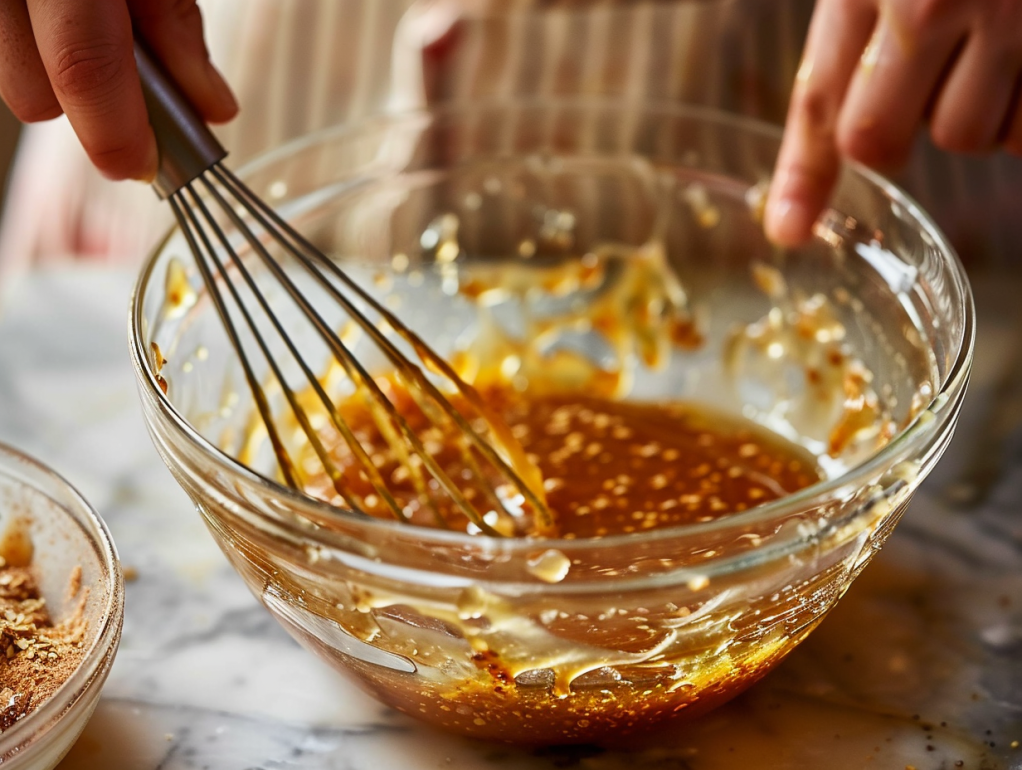
The Glaze Secret: Making the glaze ahead allows flavors to meld. The acid from the vinegar helps tenderize the chicken while the honey caramelizes beautifully in the air fryer’s hot circulating air, creating that gorgeous golden coating.
Air Fryer Cooking Process
Temperature: 375°F (190°C)
Time: 16-20 minutes total
Internal Target: 165°F (74°C)
Step 1: Initial Setup
- Preheat air fryer to 375°F for 3-5 minutes
- Spray basket generously with cooking spray
- Arrange chicken in single layer with space between pieces
- Don’t overlap, proper airflow is critical for even glazing
Step 2: First Cooking Phase
- Place seasoned chicken in air fryer basket
- Cook 8 minutes without opening
- Chicken should be starting to cook through
- Edges will begin to turn opaque
Step 3: First Glaze Application
- Carefully flip chicken using tongs
- Brush generously with honey mustard glaze (use ⅓ of cooking portion)
- Return to air fryer
- Cook 4 minutes
Step 4: Second Glaze Layer
- Flip chicken again
- Apply second generous coat of glaze to both sides
- This builds that beautiful caramelized coating
- Cook 4-6 more minutes
Step 5: Final Glaze and Finish
- Check internal temperature (should be 160°F or higher)
- Apply final thin layer of glaze
- Cook 1-2 more minutes until glaze is bubbly and caramelized
- Internal temperature should reach 165°F
Step 6: Rest and Serve
- Let chicken rest 5 minutes before slicing
- This allows juices to redistribute
- Glaze will set slightly during resting
- Drizzle with reserved fresh glaze before serving
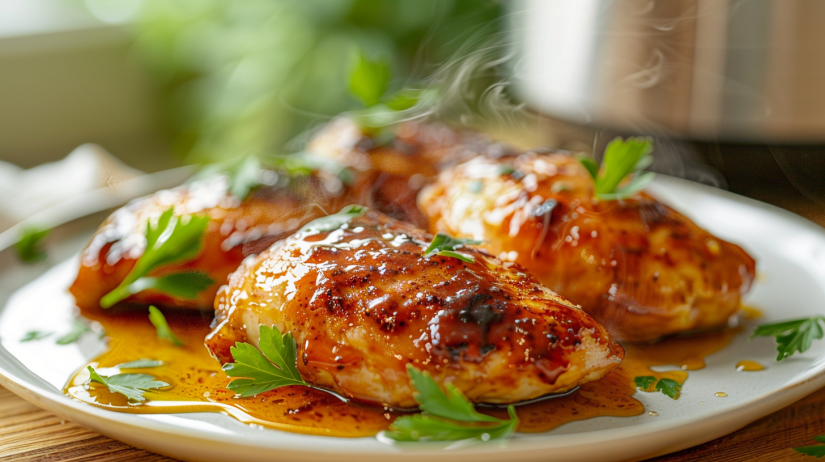
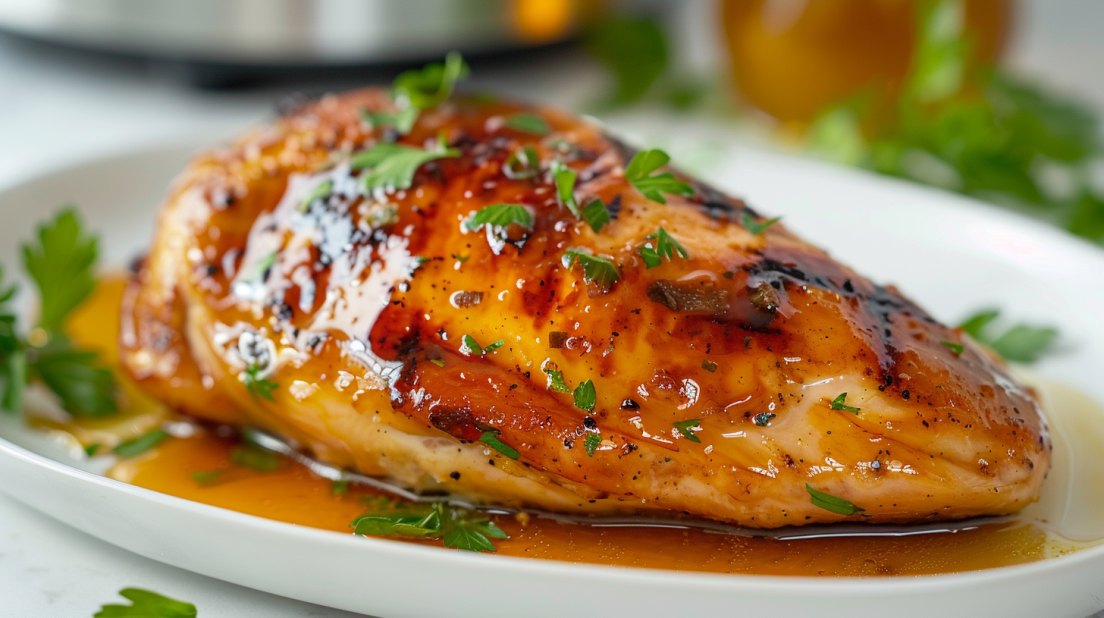
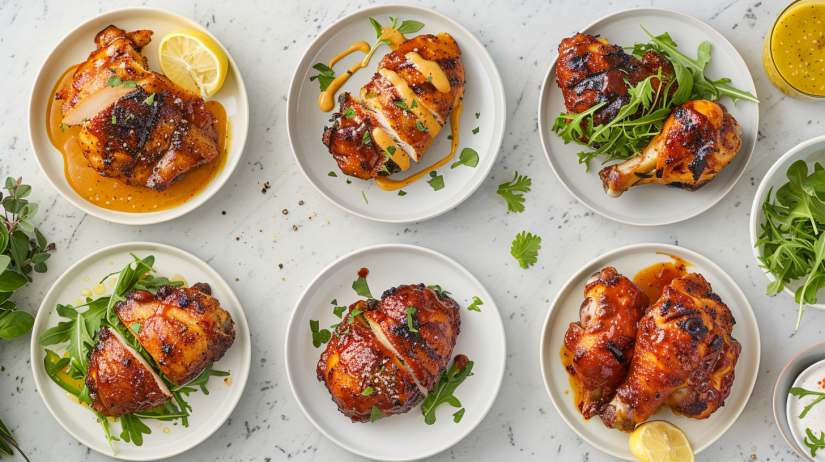
Visual cues for perfect doneness: Deep golden-brown glaze with slight caramelization at edges, internal temperature of 165°F, juices running clear when pierced, and meat firm but springy to touch.
Flavor Variations That Work
Classic Honey Mustard
- Recipe as written above
- Perfect balance of sweet and tangy
- Family favorite
- Great with any sides
Spicy Honey Mustard
- Add 1-2 teaspoons sriracha to glaze
- Increase cayenne to ½ teaspoon
- Drizzle extra sriracha on top
- For heat lovers
Maple Dijon
- Replace honey with pure maple syrup
- Add 1 teaspoon thyme
- More sophisticated, less sweet
- Autumn-inspired flavor
Lemon Honey Mustard
- Add zest of 1 lemon to glaze
- Include 1 tablespoon lemon juice (replace some vinegar)
- Finish with fresh lemon slices
- Bright and fresh
Garlic Lovers
- Add 2 cloves minced fresh garlic to glaze
- Double the garlic powder
- Toss with garlic butter after cooking
- Rich and aromatic
Herb Garden
- Add 2 teaspoons fresh rosemary to glaze
- Include 1 teaspoon dried thyme
- Garnish with fresh parsley
- Garden-fresh flavor
Sweet & Smoky
- Add 1 teaspoon smoked paprika
- Include ½ teaspoon liquid smoke
- Increase honey by 1 tablespoon
- BBQ-inspired twist
Asian-Fusion
- Replace mustard with 2 tablespoons miso paste
- Add 1 teaspoon fresh grated ginger
- Include 1 tablespoon soy sauce
- Garnish with sesame seeds and green onions
Storage & Meal Prep Tips
Fresh Storage:
- Refrigerate: Up to 4 days in airtight container
- Best quality: Consume within 2-3 days for optimal taste
- Storage tip: Keep extra glaze separate to prevent sogginess
- Container choice: Glass containers maintain moisture better
Freezing Strategy:
- Freeze cooked: Cool completely, slice, wrap individually, freeze up to 3 months
- Freeze uncooked: Season chicken (no glaze), freeze up to 2 months, cook from frozen (add 5 minutes)
- Glaze separately: Freeze glaze in ice cube trays for portioned convenience
- Thawing: Overnight in refrigerator for best results
Meal Prep Success:
- Batch cooking: Make 6-8 breasts on Sunday for week’s lunches
- Portion control: 4-5 oz chicken per meal container
- Meal prep containers: Portion with vegetables and grains
- Glaze storage: Keep fresh glaze separate, add at serving time
Reheating Methods:
- Air fryer: 350°F for 4-5 minutes (best for maintaining texture)
- Oven: 350°F for 8-10 minutes covered with foil, uncovered last 2 minutes
- Microwave: 1-2 minutes covered with damp paper towel (glaze may separate)
- Stovetop: Slice and warm in skillet with splash of water (2-3 minutes)
Pro tip: Honey mustard chicken is perfect for meal prep because the flavors actually improve after a day in the refrigerator! The mustard continues to tenderize the chicken while the honey creates a protective coating that keeps meat moist.
Recipe Success Stories
What Real Families Are Saying:
“My picky 8-year-old who ‘doesn’t like chicken’ asks for this twice a week! The sweet glaze makes it perfect for kids.” – Sarah M.
“This has become my go-to for meal prep. Makes 8 pieces on Sunday, lunches sorted for the week!” – Michael T.
“Better than any restaurant honey mustard chicken I’ve tried. The glaze is perfectly balanced, not too sweet!” – Jennifer K.
“Served this for dinner party and everyone asked for the recipe. So simple but looks fancy!” – Amanda R.
For more family-tested air fryer chicken recipes that make weeknight dinners exciting:
- Complete Air Fryer Chicken Recipes Collection – 15+ crowd-pleasing favorites
- Air Fryer Chicken Drumsticks – Classic crispy perfection
- Air Fryer BBQ Chicken Legs – Sweet and sticky
- Air Fryer Orange Chicken – Better than takeout
Follow LunaChef on Pinterest for daily meal inspiration and air fryer cooking tips!
Frequently Asked Questions
Can I use chicken thighs instead of breasts?
Absolutely! Chicken thighs work beautifully with this recipe. They’re more forgiving and stay juicier. Use bone-in thighs and increase cooking time by 4-5 minutes. Boneless thighs cook in about the same time as breasts.
What if I don’t have whole grain mustard?
You can use all Dijon mustard. The whole grain adds texture and visual appeal, but all Dijon works perfectly fine. For extra texture, add 1 teaspoon yellow mustard seeds to the glaze.
Can I make the glaze ahead of time?
Yes! Make glaze up to 3 days ahead and refrigerate. Bring to room temperature before using for easier brushing. The flavors actually improve as they meld together.
My air fryer is smaller, how do I adjust?
Cook in batches rather than overcrowding. Overlapping chicken won’t cook evenly and glaze won’t caramelize properly. Most recipes scale down perfectly to 2 pieces if needed.
Can I use frozen chicken?
Not recommended for this recipe. Frozen chicken releases too much moisture during cooking, preventing the glaze from adhering and caramelizing properly. Always thaw completely and pat dry first