
This Peanut Butter Easter Eggs recipe comes together in about 30 minutes with a no-bake method that’s perfect for a quick and easy treat your family will definitely love! These little goodies are versatile, so you can switch up the ingredients to suit your taste or make them a fun way to clean out your pantry! Everyone will be asking for these when Easter rolls around!
Ingredient Breakdown
- Natural Runny Peanut Butter (1 1/4 cup)
- Maple Syrup (1/4 cup)
- Powdered Sugar (1/4 cup)
- Almond Flour (1/3 cup)
- Vanilla Extract (1/2 teaspoon)
- Pinch of Salt
- White Chocolate Melting Wafers (8 ounces)
- Coconut Oil (2 teaspoons)
- Blue Spirulina (1/2 teaspoon) + Matcha Powder (1/4 teaspoon)
- Cocoa Powder + Water for Speckles (1 teaspoon cocoa powder + 1 tablespoon water)
How to Make Peanut Butter Easter Eggs
Combine the Filling: In a mixing bowl, beat together the peanut butter, maple syrup, powdered sugar, almond flour, vanilla extract, and a good pinch of salt until everything is well combined, think of it as a sweet, creamy mixture. It should take about 3-4 minutes!
Shape the Eggs: Portion the peanut butter filling into 2-tablespoon portions. Roll each one into a ball and then use your hands to shape the ball into an oval, like little eggs. They don’t have to be perfect, but aim for a nice oval shape! Place them on a parchment paper-lined baking sheet and freeze for about 15 minutes while you prepare the coating.
Prepare the Coating: In a small bowl, whisk together the cocoa powder and water, this should create a thin paste for speckling later on. Set this aside.
Melt the Chocolate: In a microwave-safe bowl, add the white chocolate melting wafers and coconut oil. Microwave in 15-20 second bursts, stirring well in between, until everything is fully melted and combined. It should become silky smooth! Now, stir in the spirulina and matcha, adjusting the colors as desired. I mean, isn’t this just a feast for the eyes?
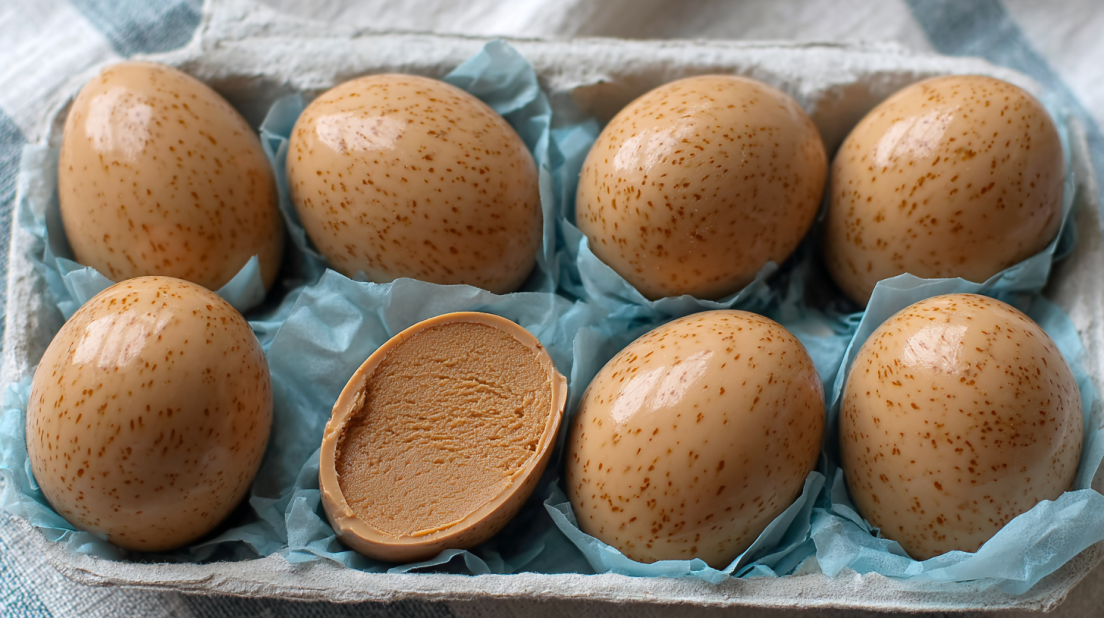
Coating the Eggs: Now here’s where the magic happens: Take the semi-frozen peanut butter eggs out of the freezer. Stick a toothpick in the bottom of each egg and dip it into the melted white chocolate. Let the excess drip off before placing it back on the parchment paper. This step can be a bit messy, so have fun with it! If you wait too long to remove the toothpick, things might get messy, so work quickly.
Create Speckles: To get the adorable speckled look, dip a pastry brush into the cocoa powder/water mixture, then hold it about 8 inches above and gently flick the tip over the eggs. Oh! And pro tip: wear an apron for this, just in case things get a bit chaotic!
Chill to Set: Place the coated eggs back in the fridge for about 10 minutes or until the chocolate dries out.
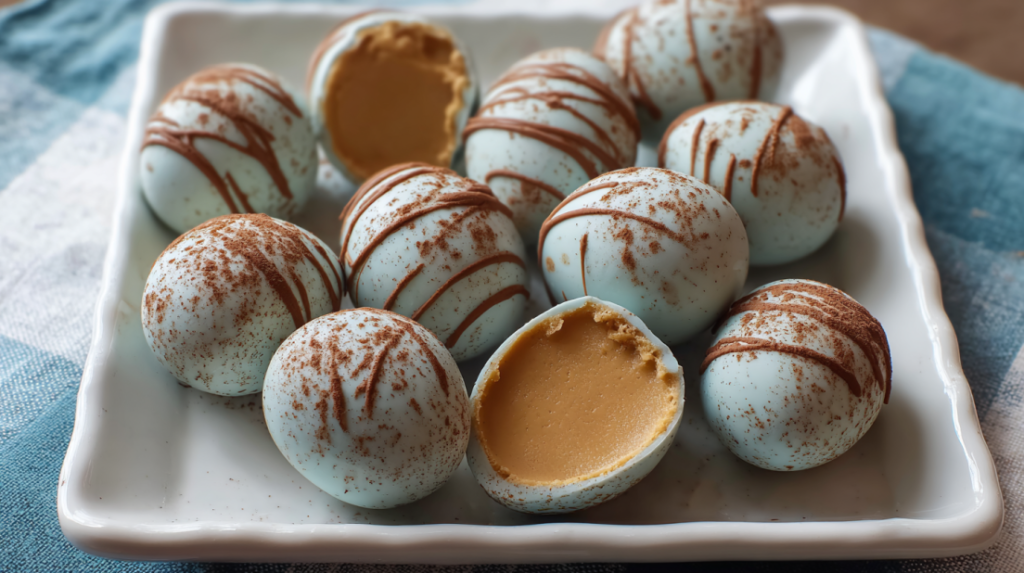
And voilà! You have adorable, delicious Peanut Butter Easter Eggs ready to impress everyone!
Why This Recipe Works
Quick & Easy
This recipe is fantastic because it comes together in under 30 minutes (with chilling time involved)! You can whip this up while catching up on a show or getting the kiddos involved!
Make-Ahead Friendly
These Peanut Butter Easter Eggs are perfect for preparing in advance. Just make them ahead of time and store them in the fridge! Easy peasy!
Crowd-Pleaser
Talk about a treat that the whole family will love! Everyone from the kiddos to your spouse will be asking for seconds, you might want to hide a few for yourself, haha!
Customizable
The best part is that you can tweak these eggs to your heart’s content! Need to adjust for allergies or preferences? Switch out the almond flour for gluten-free flour or change the nut butter!
Serving & Storage Tips
How to Serve
These Peanut Butter Easter Eggs are fantastic on their own, but they also work splendidly on a dessert platter! You can pair them with fruit or other sweets for a lovely dessert spread.
How Long Do They Keep?
In the fridge, these delicious treats can keep for about 2 weeks if stored in an airtight container. Just make sure they don’t get squished!
Reheating Instructions
No reheating is necessary, but if you want a melty dip, you could pop just one in the microwave for about 5-10 seconds, very gently though!
Freezer Friendly?
Absolutely! You can freeze these babies. Just be sure to wrap them individually and keep them in a freezer-safe bag or container. They’ll last for about 1-2 months in the freezer. To thaw, gently bring them to room temperature before diving in!
I’m a real sucker for these Peanut Butter Easter Eggs! This is my go-to recipe when I need a quick treat that satisfies that sweet tooth and looks adorable for any holiday table. The best part is you can use whatever you’ve got on hand. Last time I made these, my neighbors couldn’t get enough of them!
If you loved this recipe, be sure to check out my Easter Poke Cake, my Carrot Cake Truffles, or my Lemon Tiramisu! These are a few great ideas that your family will enjoy.
Food is all about bringing people together, right? So why not whip up a batch of these Peanut Butter Easter Eggs and create some sweet memories together!
Now it’s your turn, get in the kitchen and enjoy making these colorful, creamy treats! Trust me, they’re worth every moment! Follow us on Pinterest for daily meal inspiration!
Peanut Butter Easter Eggs
Ingredients
Method
- In a mixing bowl, beat together the peanut butter, maple syrup, powdered sugar, almond flour, vanilla extract, and a good pinch of salt until well combined.
- Portion the mixture into 2-tablespoon portions, roll into balls, and shape them into ovals. Place on a parchment-lined baking sheet and freeze for about 15 minutes.
- In a small bowl, whisk together the cocoa powder and water to create a thin paste.
- In a microwave-safe bowl, melt the white chocolate wafers with coconut oil in intervals, stirring between until smooth. Stir in spirulina and matcha.
- Take the semi-frozen peanut butter eggs out of the freezer. Use a toothpick to dip each egg in the melted chocolate, allowing excess to drip off.
- To make speckles, dip a pastry brush in the cocoa paste and flick over the coated eggs.
- Place the coated eggs back in the fridge for about 10 minutes to set.