
This delicious Okonomiyaki comes together in about 30 minutes and is made all in one pan for a quick and easy weeknight dinner that your family will adore! Switch up the fillings to suit your taste, or use it as a “clean out the fridge” meal to get rid of those leftovers and odds and ends. So let’s dive into this comfort food classic that is not only satisfying but also super versatile!
Ingredient Breakdown
- 3 packed cups finely shredded cabbage (about ½ medium)
- 1¼ cups chopped scallions (about 1 bunch)
- 1 cup panko breadcrumbs
- ¾ teaspoon sea salt
- 3 large eggs (beaten)
- Extra-virgin olive oil (for brushing)
- Vegan Worcestershire sauce (Annie’s recommended)
- Mayo (Sir Kensington’s or Kewpie recommended)
- Sesame seeds, pickled ginger, and ½ sheet nori (sliced)
- ½ cup microgreens (optional)
How to Make Okonomiyaki
Mix the Veggies : In a large bowl, combine the cabbage, scallions, panko, and salt. Give it a good stir until everything is mixed. Now, gently mix in the beaten eggs! (Note: the mixture will be really loose and cabbagey, think more slaw texture than pancake batter. If it seems a bit dry, let it sit for about 10 minutes to soften.)
Preheat Your Skillet : Heat a nonstick skillet over medium heat and brush it generously with olive oil. You want it nice and hot! Grab a ¼ measuring cup, and scoop the cabbage mixture into the skillet, plopping it down onto the pan (it’s okay if it doesn’t really stick together; it’ll come together as it cooks).
Shape and Cook : Flatten each mound gently with a spatula until it’s about half an inch thick. This is where the magic happens, cook for about 3 minutes per side, or until they’re golden and crisp! If you see them browning too quickly, don’t hesitate to turn down the heat a bit. After the first batch is made, you can keep the cooked Okonomiyaki warm in the oven while you cook the rest. Just wipe out the skillet between batches and brush with more oil!
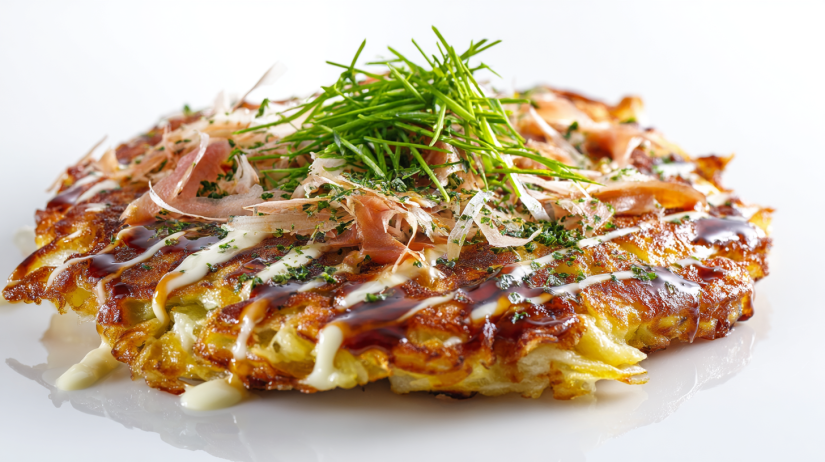
Top It Off : Drizzle your Okonomiyaki with vegan Worcestershire sauce and squeeze a thin line of mayo on top. I like to get fancy here and zig-zag it! Top with sesame seeds, pickled ginger, and sliced nori. Feel free to add microgreens if you’ve got them! Serve these hot but know, leftovers are just as delicious!

I always serve these with a side salad or some sautéed veggies for a complete meal. It’s the perfect way to make every family member happy!
Why I Love This Recipe
Let me tell you, this is my go-to recipe when I’m in a pinch but still want something comforting and delicious. I’m a real sucker for dishes loaded with flavor, and this one checks all the boxes. Plus, the best part is the versatility! You can use whatever you’ve got on hand, from leftover veggies to proteins, making it epic for busy weeknights or when you need to clean out the fridge. Seriously, my family asks for this weekly, can’t get enough!
If you loved this Okonomiyaki, be sure to check out my Fruit Cream Sandwiches, my Hawaiian Spam Musubi with Sushi Nori Seaweed, or my Gyoza Soup!
Why This Recipe Works
Quick & Easy
This Okonomiyaki comes together in under 30 minutes and makes a fantastic weeknight meal option! It’s faster than takeout and way healthier, what’s not to love?
Minimal Cleanup Required
Say goodbye to monumental messes! With this all-in-one skillet method, minimal cleanup is required, making it a real winner for busy cooks.
Customizable
Feeling adventurous? Use whatever ingredients you have! Splash in some shredded carrots, diced bell peppers, or even leftover meats. The sky’s the limit!
Budget-Friendly
This recipe uses affordable, everyday ingredients that you probably have on hand. Plus, goodbye food waste, right?
Comfort Food
Packed with freshness, flavor, and oh-so-good textures, this Okonomiyaki is the embodiment of comfort food. I mean, who wouldn’t want to dig into a plate of this goodness?
Serving and Storage Tips
How to Serve This Okonomiyaki
These delightful pancakes are best enjoyed right off the skillet! I recommend serving with a light salad or some steamed veggies for complete satisfaction.
Storage
Leftovers can be stored in an airtight container in the refrigerator for up to 2-3 days. Just know that they might lose a bit of their crispiness, but they’ll still be packed with flavor!
Reheating Instructions
When you’re ready to eat those leftovers, simply reheat them in a skillet over medium heat until warmed through and a bit crispy again. Alternatively, you can zap them in the microwave but… you may lose that lovely texture we love.
Freezer-Friendly
Yes! These Okonomiyaki can be frozen. Just cool them down completely, wrap tightly, and freeze for up to 3 months. Reheat from frozen in the skillet, or bake them in the oven until heated through.
And there you have it! Do you see how easy? You’re gonna love whipping up this delicious Okonomiyaki that your family will enjoy together. It’s comfort food at its best, creamy, savory, and healthy. Happy cooking! Follow us on Pinterest for daily meal inspiration!
Okonomiyaki
Ingredients
Method
- In a large bowl, combine the cabbage, scallions, panko, and salt. Stir until mixed, then gently mix in the beaten eggs.
- Let the mixture sit for about 10 minutes if it seems a bit dry to soften.
- Heat a nonstick skillet over medium heat and brush generously with olive oil.
- Scoop the cabbage mixture into the skillet using a ¼ measuring cup, placing it onto the pan.
- Flatten each mound with a spatula until about half an inch thick.
- Cook for about 3 minutes per side or until golden and crisp.
- Keep cooked Okonomiyaki warm in the oven while cooking the rest, wiping out the skillet between batches.
- Drizzle with vegan Worcestershire sauce and squirt mayo on top.
- Add sesame seeds, pickled ginger, and sliced nori, along with optional microgreens.