

How to Make a Doll Cake Step by Step
Introduction to Doll Cakes
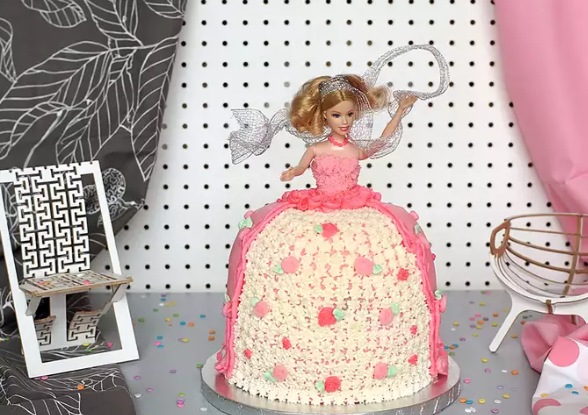
Doll cakes are a type of cake where a doll is inserted into the middle, and the dress of the doll is created with cake and frosting. The result is a fun, decorative, and delicious cake that looks like a princess in a beautiful gown. These cakes are popular for birthdays, especially for young girls, and can be made in a variety of designs and flavors.
In this guide, we will walk you through how to create your very own doll cake from scratch. Whether you are a seasoned baker or a beginner, this easy-to-follow process will help you achieve a beautiful doll cake with minimal fuss.
What You Will Need
To get started, gather all the ingredients and tools you’ll need for this fun cake project.
Ingredients for the Doll Cake
- Cake Ingredients:
- 2 cake mixes (or homemade cake recipe of your choice)
- 2-3 eggs (depending on your cake mix)
- 1 cup water
- ½ cup oil
- Butter (for greasing pans)
- Buttercream Frosting Ingredients:
- 1 cup unsalted butter, softened
- 4 cups powdered sugar
- 2 teaspoons vanilla extract
- 2-3 tablespoons milk (or heavy cream)
- Food coloring (optional)
- Other Essentials:
- A doll (preferably a plastic Barbie doll or any similar doll with a removable skirt)
- Cake pans (one 6-inch round and one 10-inch round)
- Wooden dowel or cake separator (for doll stability)
- Piping bags and tips
- Fondant (optional, for additional decoration)
Preparing the Cake
Step 1: Bake the Cake Layers
- Preheat your oven to 350°F (175°C). Grease your cake pans with butter or non-stick spray, then dust them lightly with flour to ensure easy removal.
- Prepare the cake batter by following the instructions on your cake mix boxes. For a homemade cake, simply mix all ingredients as directed.
- Divide the batter evenly between the two cake pans. The 10-inch pan will be used for the gown base, while the 6-inch pan will form the top part of the gown.
- Bake the cakes as per the directions on the box, usually about 25-30 minutes, or until a toothpick inserted in the center comes out clean.
- Cool the cakes for about 10 minutes in the pans, then transfer them to wire racks to cool completely before decorating.
Assembling the Doll Cake
Step 2: Trim and Stack the Cake Layers
- Trim the cakes: Once the cakes are completely cooled, carefully trim off any domed tops to create flat surfaces. This will help your cake layers stack evenly.
- Place the larger cake layer (10-inch) on the cake board or plate, and use a serrated knife to create a slight indent in the center. This will help secure the doll and keep it from tipping.
- Cut the 6-inch cake in half horizontally so that you have two thinner layers. Place one layer on top of the larger cake layer.
- Secure the layers: Use a small amount of frosting between the layers to hold them together.
Decorating the Doll Cake
Step 3: Insert the Doll and Secure It
- Prepare the doll: Choose a plastic doll, preferably with removable legs, as you will need to insert the doll into the center of the cake. You can use a Barbie doll, a princess doll, or any other similar doll that fits the size of your cake.
- Remove the legs of the doll: Carefully remove the legs of the doll. You will be left with a torso and arms, which will be placed inside the cake.
- Insert the doll into the center of the cake. Use a small amount of frosting to hold the doll in place. Ensure that the doll’s body is securely centered so that it doesn’t lean or fall.
- Stabilize the doll: For additional stability, use a wooden dowel or a cake separator to support the doll and keep it upright.
Creating the Doll’s Dress
Step 4: Frosting the Cake
- Prepare the buttercream frosting by mixing the butter, powdered sugar, and vanilla extract until smooth. Add milk to adjust the consistency, then divide the frosting into bowls if you want to use different colors for the dress.
- Frost the cake with a crumb coat: Apply a thin layer of frosting over the entire cake to seal in any crumbs. Once covered, refrigerate the cake for about 15 minutes to firm up the crumb coat.
- Add the final layer of frosting: After the crumb coat has set, apply a thicker layer of frosting to the top and sides of the cake. Use a spatula to smooth the frosting to create the smooth “gown” of the doll.
- Shape the dress: To create a more rounded shape, use a spatula to gently pull the frosting down around the sides of the cake, mimicking the shape of a gown. You can also use a piping bag to add ruffles or a decorative effect to the dress.
* Step 5: Decorating the Dress
- Piping designs: Use a piping bag fitted with various tips to create intricate designs on the dress. You can use a star tip to make beautiful ruffles or a petal tip to create flowers.
- Add fondant decorations (optional): Roll out fondant to create additional embellishments for the dress. You can cut fondant into shapes like flowers, bows, or any other design you prefer.
- Finishing touches: Add glitter, sprinkles, or edible pearls to make the dress sparkle. You can also use food coloring to paint details like a bodice, sleeves, or any desired patterns.
Step 6: Add Final Details
- Dress the doll: Depending on your design, you can dress the doll with accessories such as fondant bows, tiaras, or even a fondant belt.
- Optional decorations: If you’d like, add extra elements like edible flowers or even small doll-sized accessories to the cake’s base for added decoration.
Conclusion
Creating a doll cake is a fun and rewarding project that can be customized to any occasion. Whether you choose a princess theme or something more modern, the options are endless. With a little patience and creativity, you can create a beautiful and delicious cake that will wow your guests. Don’t forget to enjoy the process, and most importantly, the cake itself!
FAQs
Can I use any type of doll for the cake?
Yes, you can use any doll that fits into your cake design. However, ensure that the doll is made of non-toxic plastic and that you remove its legs before inserting it into the cake.
Can I make the doll cake in advance?
Yes! You can bake the cake and assemble it the day before. Just make sure to store the cake in a cool place or refrigerate it to preserve its freshness.
Can I make a doll cake without fondant?
Yes, fondant is optional. You can decorate the doll cake entirely with buttercream frosting or any other decorations like edible pearls or sprinkles.
How can I make the doll cake more stable?
To ensure the doll cake is stable, make sure to insert a wooden dowel into the center of the cake or use a cake separator. This will keep the doll upright and prevent it from falling.
Can I customize the dress of the doll?
Absolutely! You can customize the doll’s dress with different colors, textures, and decorations. You can even make the dress look like a ball gown, princess dress, or fairy tale costume!
How long does a doll cake last?
A doll cake can last for 2-3 days when properly stored in a cool, dry place. If refrigerated, it may last longer, but the texture of the frosting may change.
Conclusion
Making a doll cake is a fun and creative way to celebrate a special occasion, especially for little ones who love dolls. The process is simple, and with the right steps, you can create a beautiful and unique cake that will impress everyone.
Start by preparing a cake batter of your choice, whether it’s from scratch or store-bought. Bake two round cakes, one larger than the other, to form the base and the skirt of the doll cake. Allow the cakes to cool completely before assembling.
Once cooled, level the cakes and stack them, with the smaller one on top. Carve out the center of the larger cake to fit the base of the doll, ensuring the doll fits snugly. Insert the doll into the center, with her body acting as the central support for the skirt.
Next, frost the cake with a smooth layer of buttercream or fondant. You can be creative with the decorations, choosing colors and designs that match your theme. To create a beautiful, voluminous skirt, use frosting or piped icing to form layers and texture. You can also add edible embellishments like flowers, pearls, or sugar crystals to make the dress even more elaborate.
The doll’s “dress” is typically the focus of the cake, so ensure the skirt looks as realistic as possible. After decorating, you can add finishing touches like a bow or a tiara for the doll.
In conclusion, a doll cake is a delightful and imaginative dessert for any celebration. By following these simple steps, you can create a cake that’s not only delicious but also a stunning centerpiece. With a little creativity and patience, your homemade doll cake will be a memorable addition to your event.