
Introduction
If you’re looking for a decadent, mouthwatering dessert that will wow your guests, a cherry cheesecake is a perfect choice. With its creamy, smooth texture and the tangy-sweet flavor of fresh cherries on top, this cheesecake is a classic crowd-pleaser. Whether you’re preparing for a family gathering, a holiday feast, or just a special treat, this recipe will leave everyone asking for more.
In this recipe, we’ll guide you through the steps to create a homemade cherry cheesecake from scratch. It’s not overly complicated, but it does take some time to assemble. The combination of a buttery graham cracker crust, a velvety cheesecake filling, and a luscious cherry topping is simply irresistible.
Let’s get started!
Ingredients for Cherry Cheesecake
To make the best cherry cheesecake, you’ll need the following ingredients:
For the Graham Cracker Crust:
- 1 ½ cups of graham cracker crumbs (about 10 graham crackers)
- ⅓ cup of sugar
- 6 tablespoons of unsalted butter, melted
- ¼ teaspoon of ground cinnamon (optional)
The Cheesecake Filling:
- 3 packages (8 ounces each) of cream cheese, softened
- 1 cup of granulated sugar
- 1 teaspoon of vanilla extract
- 3 large eggs
- 1 cup of sour cream (adds extra creaminess)
- 2 tablespoons of all-purpose flour (helps to stabilize the filling)
For the Cherry Topping:
- 2 cups of fresh or frozen cherries (if using frozen, thaw and drain)
- ½ cup of sugar
- 2 tablespoons of cornstarch
- 1 tablespoon of lemon juice
- ½ cup of water
- ½ teaspoon of vanilla extract (optional)
Instructions to Make Cherry Cheesecake
Step 1 – Preparing the Graham Cracker Crust
Start by preparing the crust, as it needs to set in the refrigerator before baking. Here’s how:
- Preheat your oven to 325°F (163°C).
- In a medium-sized bowl, combine the graham cracker crumbs, sugar, cinnamon (if using), and melted butter.
- Stir everything together until the crumbs are fully coated with butter, and the mixture has a sand-like texture.
- Press the mixture firmly into the bottom of a 9-inch springform pan, making sure it’s evenly spread and compact.
- Bake the crust for 8-10 minutes, or until it’s golden brown. Remove it from the oven and allow it to cool while you prepare the filling.
Step 2 – Making the Cheesecake Filling
Now that the crust is cooling, let’s work on the creamy cheesecake filling:
- In a large mixing bowl, beat the softened cream cheese with an electric mixer on medium speed until smooth and creamy.
- Add the granulated sugar and vanilla extract. Beat again until everything is well combined.
- Add the eggs one at a time, beating well after each addition. Make sure each egg is fully incorporated before adding the next.
- Stir in the sour cream and flour until the mixture is smooth and lump-free.
- Pour the cheesecake batter over the cooled graham cracker crust in the springform pan. Smooth the top with a spatula.
Step 3 – Baking the Cheesecake
To ensure your cheesecake bakes evenly without cracking, follow these tips:
- Place the cheesecake on the middle rack of your preheated oven.
- Bake at 325°F (163°C) for 50-60 minutes, or until the center is set but still slightly wobbly. The edges should look firm, while the middle will jiggle slightly when you gently shake the pan.
- Turn off the oven and let the cheesecake sit in the oven with the door slightly ajar for 1 hour. This helps prevent cracking.
- Afterward, remove the cheesecake from the oven and allow it to cool completely on a wire rack.
- Once cooled, refrigerate the cheesecake for at least 4 hours or overnight for the best texture and flavor.
Step 4 – Preparing the Cherry Topping
While the cheesecake is chilling, prepare the cherry topping. It’s the perfect final touch to your dessert:
- In a medium saucepan, combine the cherries, sugar, cornstarch, lemon juice, and water.
- Heat the mixture over medium heat, stirring frequently, until the sauce begins to thicken and the cherries soften (about 5-7 minutes).
- Once thickened, remove from the heat and stir in the vanilla extract.
- Let the cherry topping cool to room temperature before spreading it over the chilled cheesecake.
Assembling the Cherry Cheesecake
Once your cheesecake has fully cooled and set in the refrigerator, it’s time to assemble:
- Carefully remove the cheesecake from the springform pan.
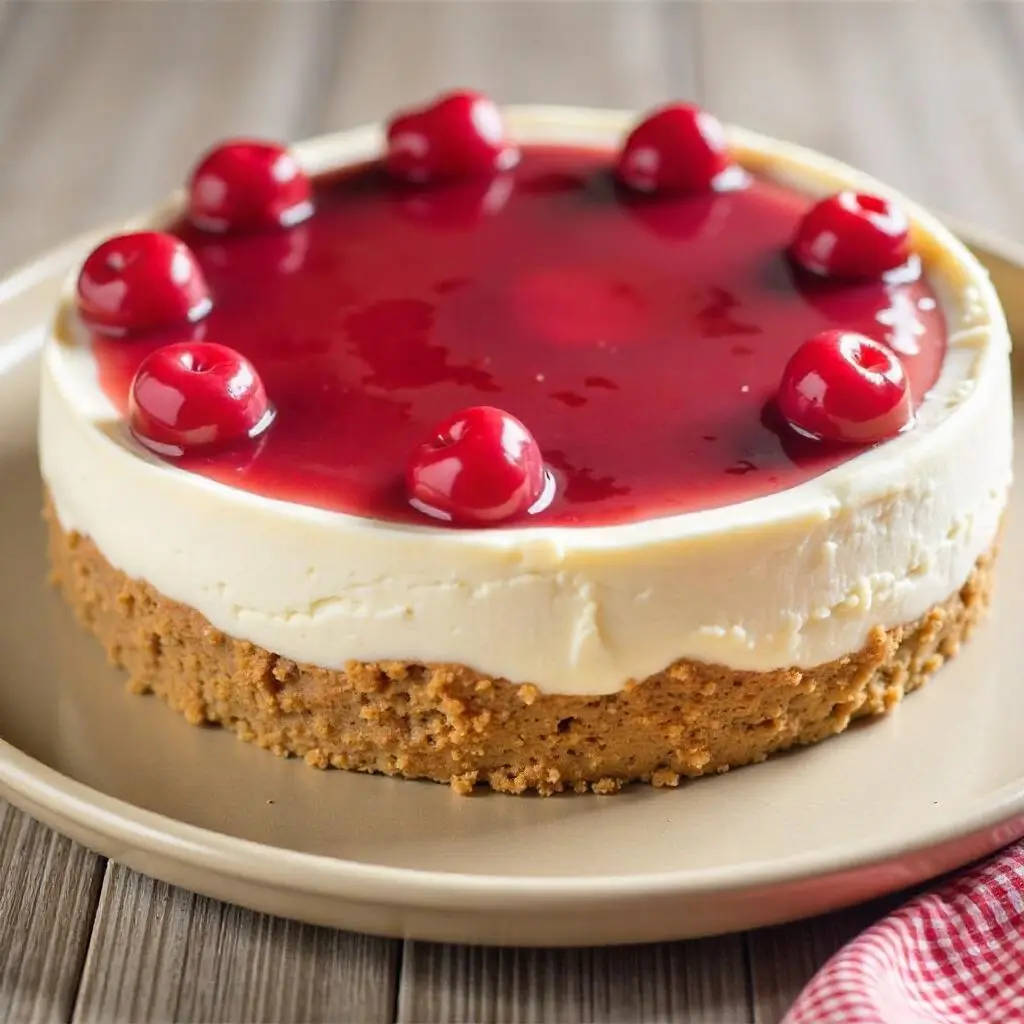
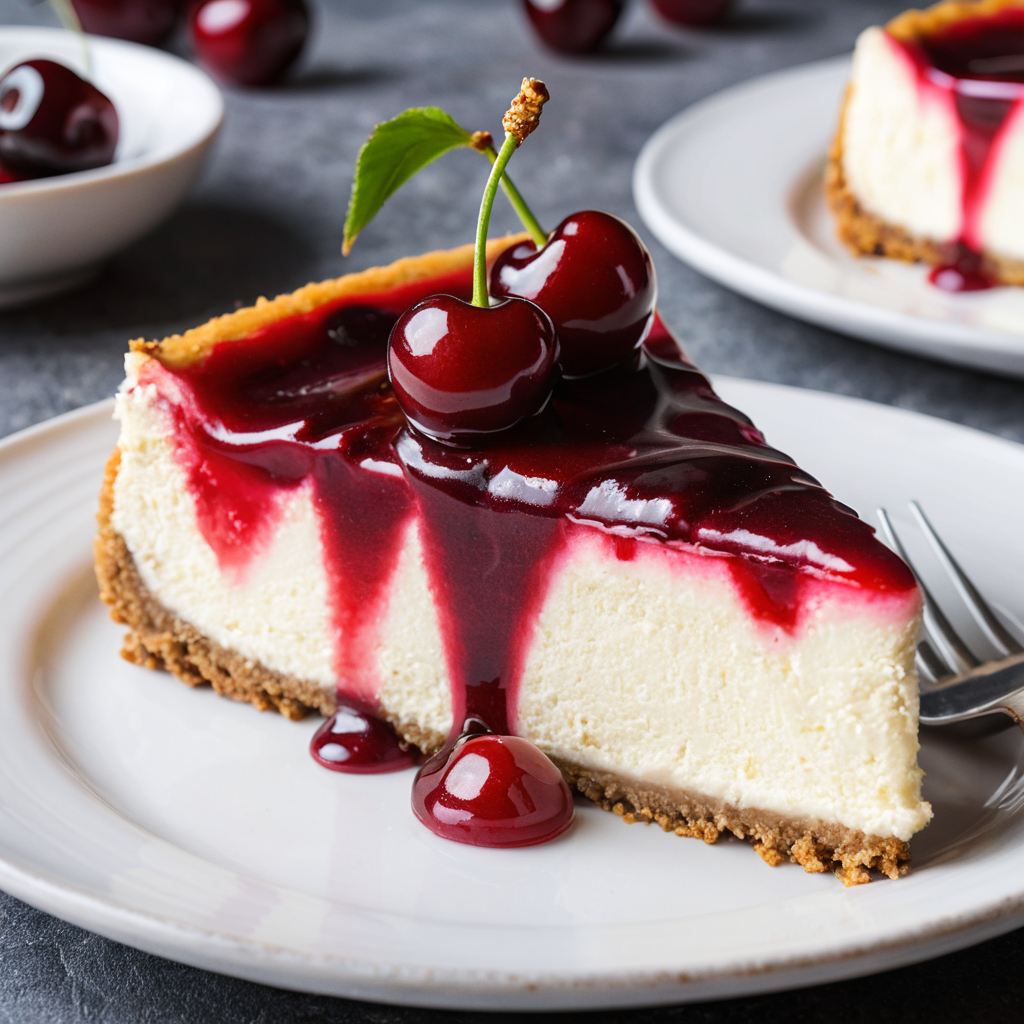
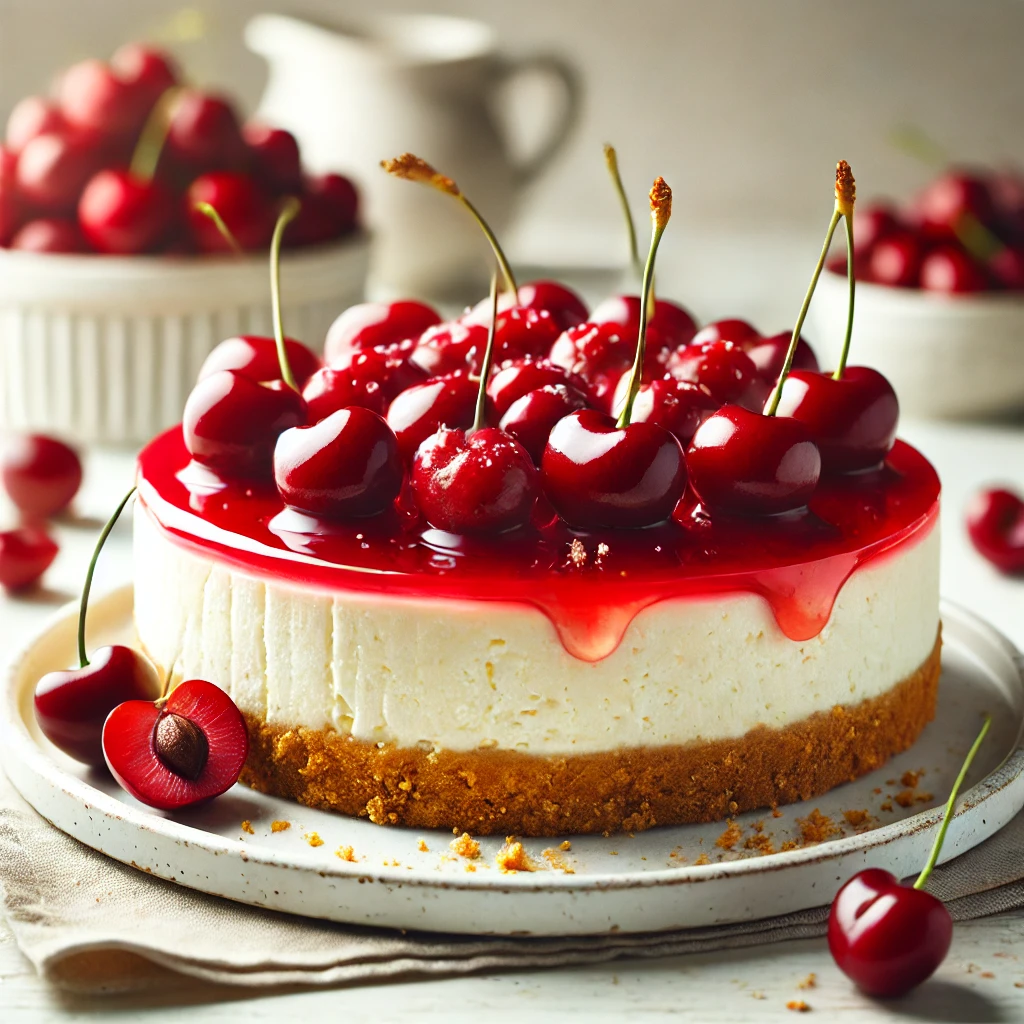
- Spread the cherry topping evenly over the top of the cheesecake, letting some of the cherries cascade over the sides.
- Serve immediately, or return the cheesecake to the refrigerator until ready to serve.
Tips for the Perfect Cherry Cheesecake
Making a cherry cheesecake can seem intimidating, but with a few simple tips, you can create a show-stopping dessert that’s creamy, flavorful, and perfectly balanced. Here are some expert tips to help you achieve the perfect cherry cheesecake every time.
1. Use Room Temperature Ingredients
One of the most important steps in making cheesecake is ensuring that your cream cheese, eggs, and sour cream are at room temperature. Cold ingredients can cause the batter to be lumpy and lead to a dense, uneven texture. Allow your ingredients to sit at room temperature for about 30 minutes before mixing them together.
2. Don’t Overmix the Batter
When making the cheesecake filling, mix the ingredients just until combined. Overmixing can incorporate too much air, which may cause cracks in your cheesecake as it bakes. A smooth and creamy batter is all you need for a perfect cheesecake texture.
3. Use a Springform Pan
For a flawless presentation, use a springform pan. This will allow you to easily remove the cheesecake from the pan without damaging it. Be sure to line the bottom of the pan with parchment paper for an even easier release.
4. Bake at Low Temperature
Baking your cheesecake at a low temperature, typically around 325°F (165°C), ensures it cooks slowly and evenly. Avoid opening the oven door frequently to prevent temperature fluctuations, which can cause cracks.
5. Let it Cool Gradually
After baking, turn off the oven and let the cheesecake cool with the door ajar for an hour. This gradual cooling process helps prevent the cheesecake from collapsing or cracking. Once cooled, refrigerate the cheesecake for at least 4 hours before serving.
6. Top with Fresh Cherries
For the final touch, top your cheesecake with fresh or lightly sweetened cherries. A homemade cherry topping is always better than canned, adding a fresh, vibrant flavor to complement the rich creaminess of the cheesecake.
Follow these tips, and you’ll have a perfect cherry cheesecake that’s sure to impress!
FAQs About Cherry Cheesecake
1. Can I use store-bought cherry pie filling instead of making my own?
Yes! If you want to save time, you can use store-bought cherry pie filling. However, making your own topping adds a fresh, homemade touch to the cheesecake.
2. Can I make this cheesecake gluten-free?
Absolutely! To make the cheesecake gluten-free, simply use gluten-free graham crackers for the crust. Double-check the other ingredients, such as the sour cream and cornstarch, to ensure they’re gluten-free.
3. How do I store leftover cheesecake?
Store leftover cherry cheesecake in an airtight container in the refrigerator. It should stay fresh for up to 5 days. You can also freeze the cheesecake for up to 3 months; just wrap it tightly in plastic wrap and foil before freezing.
4. Can I make this cheesecake ahead of time?
Yes, this cheesecake can be made up to 2 days in advance. Just keep it covered and refrigerated, and add the cherry topping right before serving.
5. How do I know when the cheesecake is done?
The cheesecake is done when the edges are firm, and the center is slightly jiggly. It will set as it cools, so don’t worry if it’s still a bit wobbly when you take it out of the oven.
6. Can I use a different fruit for the topping?
Yes, you can use other fruits like blueberries, strawberries, or raspberries for a different topping. The method for making the fruit topping remains the same.
Conclusion
In conclusion, cherry cheesecake is more than just a dessert; it’s a celebration of flavors and textures that come together to create an unforgettable treat. The rich, creamy cheesecake filling paired with a buttery graham cracker crust offers the perfect foundation, while the fresh, tangy cherry topping adds a burst of natural sweetness and a vibrant color. This dessert is a timeless classic, perfect for every occasion, from casual family dinners to elegant holiday feasts.
What makes this cherry cheesecake recipe even more special is its versatility. While the combination of graham cracker crust and cherry topping is tried and true, feel free to get creative with different fruits or toppings to suit your tastes. Blueberries, raspberries, or even a chocolate drizzle can provide unique twists, giving this cheesecake a personal touch every time you make it.
The beauty of this cheesecake lies not only in its flavor but also in its simple, straightforward preparation. With a few basic ingredients and a little patience, you can craft a dessert that looks and tastes like it came straight from a high-end bakery. The cooling and chilling time might test your patience, but once you cut that first slice and take a bite, you’ll know it was worth the wait.
Above all, this cherry cheesecake recipe is about indulgence—taking a moment to treat yourself and your loved ones to something truly special. Whether you’re a seasoned baker or someone just starting to experiment in the kitchen, this recipe is approachable and rewarding. It’s a reminder that baking, while sometimes complex, can also be a simple pleasure that brings joy to those who enjoy it.