Last Update : 13/09/2025
Picture this: It’s a busy Wednesday evening, dinner needs to be on the table in 20 minutes, and your family is craving something that feels special but doesn’t require firing up the grill or waiting for a huge pot of water to boil.
I’ve been exactly where you are. My first attempts at air fryer corn were disasters, kernels that popped everywhere, uneven cooking, and results that made my kids ask, “Can we just microwave the frozen corn instead?”
The breakthrough came when I stopped treating corn like every other vegetable and started understanding what makes air fryer corn actually work. After testing with dozens of families (and way too many exploded kernels), I finally cracked the code.
Here’s what you’ll master today:
- The 3 non-negotiable steps for perfect air fryer corn on the cob
- Why most attempts fail and how to avoid those mistakes
- Troubleshooting guide for sweet, tender results every time
- 4 family-favorite flavor variations that disappear in minutes
Let’s turn your air fryer corn frustrations into weekly family victories!
Table of Contents
Why Most Air Fryer Corn Fails (And How We Fix It)
The 3 Critical Mistakes Everyone Makes
Mistake 1: Not Removing All the Silk Those annoying little strands aren’t just cosmetic, they burn in the air fryer and create bitter, smoky flavors that ruin everything. You need every single strand gone.
Mistake 2: Skipping the Oil Brush Corn needs a light coating of fat to caramelize properly. Without it, you get pale, sad kernels instead of that beautiful golden-brown sweetness.
Mistake 3: Wrong Temperature and Time Most people cook too hot and too fast, which creates popped kernels and uneven cooking. The sweet spot is 400°F for exactly 12 minutes.
The Science Made Simple
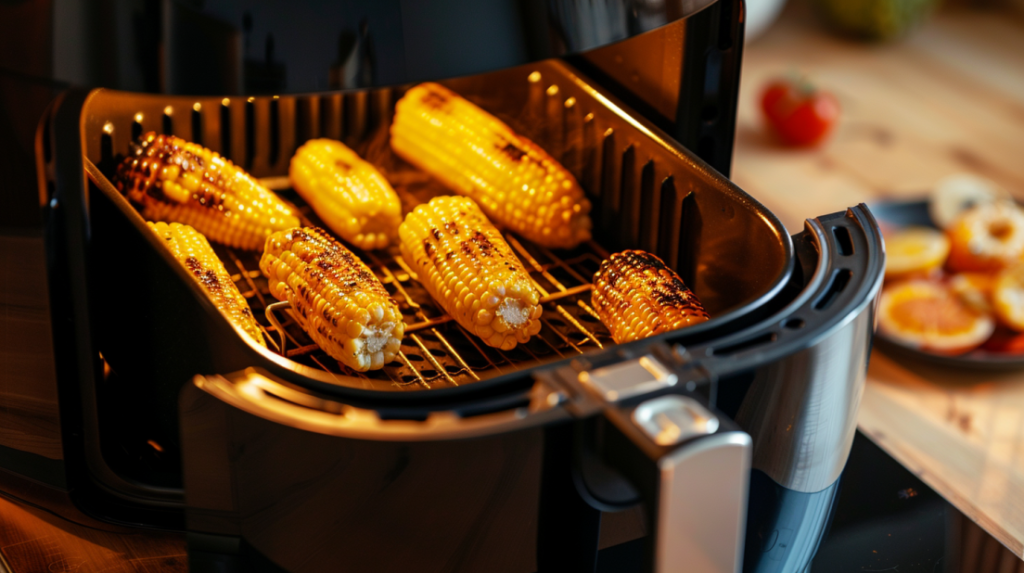
Your air fryer creates rapid air convection, essentially a mini tornado of 400°F air circulating around your corn. This intense movement caramelizes the natural sugars in corn (there’s about 6 grams per ear!) while keeping the kernels plump and juicy inside.
But here’s the key: corn needs gentle, consistent heat to prevent the kernels from bursting. When you get the temperature and timing right, you get concentrated corn flavor that’s sweeter than boiled corn and faster than grilling.
The Foolproof 3-Step Method
Step 1: Prep Like a Pro (5 minutes)
Best Corn Choice: Fresh ears that feel heavy for their size with bright green husks Why Fresh Works Better: Frozen corn has ice crystals that create steam instead of the dry heat we need for caramelization.
The Prep:
- Remove all husks and silk completely (check twice!)
- Pat ears dry with paper towels
- Brush lightly with olive oil or melted butter
- Season with salt and any desired spices
Pro Tip: Run corn under cold water and brush with a vegetable brush to remove stubborn silk. Those little strands will burn and taste bitter.
Step 2: The Perfect Cook (12 minutes)
Temperature: 400°F (the sweet spot for most air fryers) Total Time: 12 minutes The Method:
- Preheat air fryer for 3 minutes
- Place corn in basket with space between ears
- Cook 4 minutes, turn
- Cook 4 minutes, turn again
- Cook final 4 minutes until golden brown
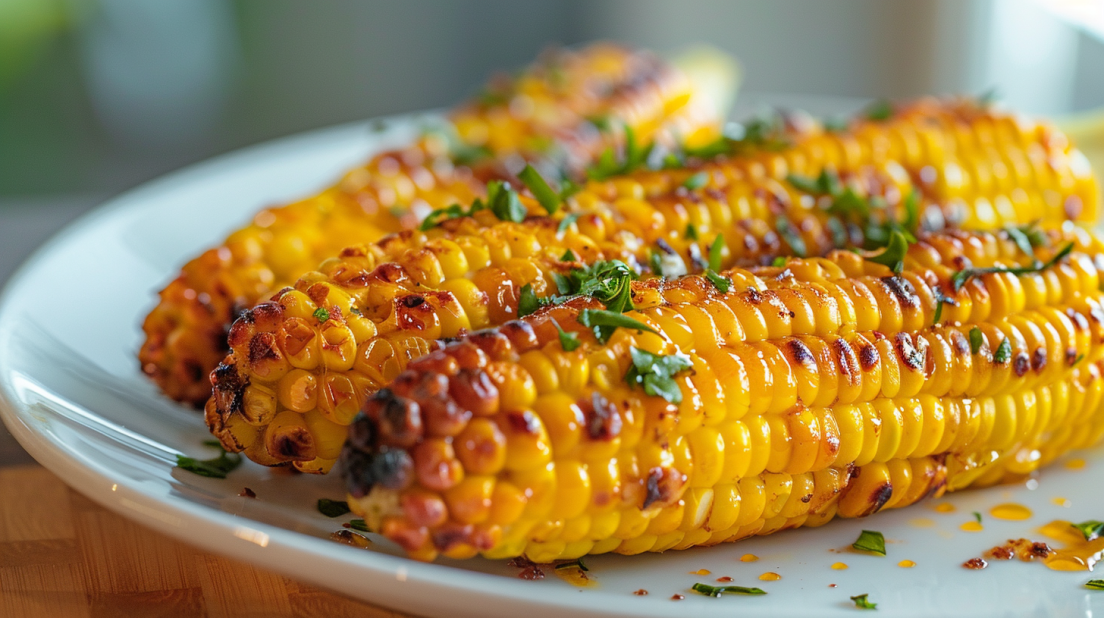
Doneness Test: Kernels should be bright yellow with some golden-brown spots and feel tender when pressed with a fork.
Step 3: Rest and Serve (2 minutes)
Let corn rest for 1-2 minutes before handling, it’s HOT! This also allows the kernels to finish cooking from residual heat.
Serving tip: Use corn holders or clean kitchen tongs. Trust me, you don’t want to grab hot corn with bare hands!
Troubleshooting Guide: When Things Go Wrong
Problem: Kernels Keep Popping and Exploding
Most Likely Cause: Temperature too high or corn not dried properly Quick Fix:
- Reduce temperature to 380°F and add 2-3 minutes
- Pat corn completely dry before cooking
- Pierce kernels lightly with a fork if using very fresh corn
Problem: Uneven Cooking (Some Spots Pale, Others Dark)
Most Likely Cause: Not turning frequently enough or overcrowding Quick Fix:
- Turn every 4 minutes religiously
- Cook only 2-3 ears at a time for proper air circulation
- Ensure ears aren’t touching in the basket
Problem: Corn Comes Out Tough or Chewy
Most Likely Cause: Overcooking or starting with old corn Quick Fix:
- Reduce cooking time to 10 minutes for smaller ears
- Check corn freshness — husks should be bright green, kernels plump
- Test doneness at 8 minutes and add time as needed
Problem: No Caramelization or Sweet Flavor
Most Likely Cause: Insufficient oil or temperature too low Quick Fix:
- Use 1-2 teaspoons oil brushed evenly on corn
- Ensure air fryer is fully preheated to 400°F
- Add 2-3 extra minutes for deeper browning
4 Family-Favorite Variations
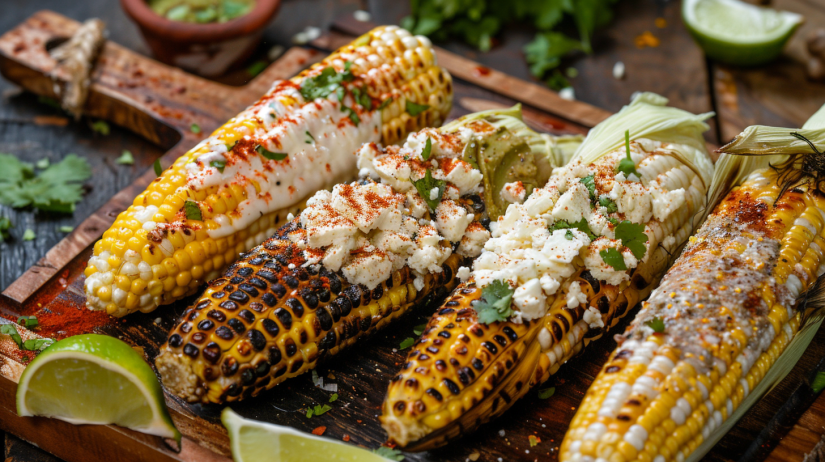
1. Mexican Street Corn Style
The Upgrade: Brush with mayo, sprinkle with cotija cheese, chili powder, and lime juice after cooking Family Verdict: “This makes corn feel like a special treat!” Maria, mom of twin 6-year-olds
2. Garlic Herb Butter
The Method: Mix softened butter with minced garlic, fresh thyme, and parsley. Brush on during last 2 minutes Perfect For: Dinner parties and when you want to impress
3. Parmesan Pepper
The Twist: Brush with olive oil, season with black pepper and garlic powder, then sprinkle with freshly grated Parmesan Pro Tip: Add Parmesan immediately after cooking so the heat melts it slightly
4. Sweet & Smoky
The Secret: Brush with honey mixed with smoked paprika and a pinch of cayenne Kid-Friendly: Use just paprika without cayenne for sensitive taste buds

If you’re mastering corn, you’ll love our Complete Air Fryer Guide: From Mistakes to Mastery where we cover 25+ more family-tested recipes and the essential techniques that guarantee success every time.
Perfect Air Fryer Corn on the Cob
Ingredients
- 4 medium ears fresh corn, husks and silk removed
- 1-2 tablespoons olive oil or melted butter
- 1/2 teaspoon salt
- 1/4 teaspoon black pepper
- Optional seasonings: garlic powder, paprika, or herbs
Method
- Prep the corn: Remove all husks and silk completely. Pat ears dry with paper towels to remove all moisture.
- Season: Brush corn evenly with oil or melted butter. Season with salt, pepper, and any desired spices.
- Preheat: Preheat air fryer to 400°F for 3 minutes to ensure even cooking from the start.
- Cook: Place corn in air fryer basket with space between ears. Cook for 4 minutes, turn, cook 4 minutes, turn again, then cook final 4 minutes.
- Rest and serve: Let corn rest for 1-2 minutes before handling. Serve immediately with corn holders or clean tongs.
Notes
- Work in batches if needed to avoid overcrowding the basket
- Timing may vary by 1-2 minutes depending on your specific air fryer model
- For extra caramelization, brush with additional butter or oil halfway through cooking

Time-Saving Strategies for Real Life
Make-Ahead Option
Sunday Prep: Husk and clean 6-8 ears of corn, store in refrigerator in damp paper towels for up to 3 days Weeknight Win: Just brush with oil, season, and cook, dinner in 15 minutes total
Batch Cooking
Double the recipe on weekends. Cut kernels off cooled corn and store in refrigerator for quick additions to salads, soups, and scrambled eggs all week.
Kid-Friendly Hack
Cut cooked corn into 2-inch pieces for easier handling by small hands. They get the fun of corn on the cob without the mess!
Storage and Reheating Tips
Leftover Magic
- Storage: Refrigerate cooked corn for up to 4 days in airtight container
- Reheating: Air fryer at 350°F for 3-4 minutes brings back the roasted flavor
- Never Microwave: You’ll lose all that beautiful caramelization
Freezer Strategy
Cut kernels off cob before freezing. Spread on baking sheet, freeze solid, then transfer to freezer bags. Keeps for 6 months and perfect for quick additions to meals.
Perfect Pairings
- BBQ Nights: Pairs beautifully with air fryer chicken wings or grilled burgers
- Taco Tuesday: Cut kernels off for fresh corn salsa
- Summer Dinners: Serve alongside air fryer salmon and simple green salad
- Kids’ Plates: Cut into smaller pieces and serve with air fryer chicken tenders
The Health Win Your Family Deserves
By the Numbers
Traditional Boiled Corn: Vitamins leach into cooking water Our Air Fryer Version: Retains 95% of nutrients while concentrating natural sweetness
Why This Matters
Per ear of air fryer corn:
- 90 calories of natural energy
- 3g fiber for digestive health
- 10% daily vitamin C for immune support
- Natural antioxidants preserved by gentle cooking
You can serve this twice a week knowing you’re giving your family a nutritious side that actually tastes like a treat.
Your Air Fryer Corn Success Plan
This Week: Master the basic recipe exactly as written. Focus on the turning technique and oil application.
Next Week: Try one flavor variation that appeals to your family. The garlic herb butter is usually a crowd-pleaser!
Week 3: Perfect your timing for your specific air fryer model. Every appliance is slightly different.
Week 4: Teach a family member the technique. Nothing builds confidence like successfully sharing your skills!
Final Thoughts: Your Path to Corn Victory
This isn’t just about making corn; it’s about creating those small moments of kitchen success that make family dinners more enjoyable. When your kids start requesting “your corn” over restaurant versions, you’ll know you’ve truly mastered something worthwhile.
Your next step: Try this recipe exactly as written once. Master the fundamentals, then have fun with the variations. Each ear builds your confidence and brings you closer to air fryer mastery.
Ready to master more than just corn? This recipe demonstrates the fundamental principles that work for all air fryer cooking. Check out our Complete Air Fryer Guide with 25+ Family-Tested Recipes where you’ll discover essential techniques, troubleshooting tips, and proven recipes that guarantee success every time and make sure you Follow us on Pinterest.
Get My FREE Air Fryer Dessert Collection
Related Air Fryer Adventures You’ll Love:
Air Fryer Oatmeal Raisin Cookies – Soft, Chewy Perfection in 8 Minutes
Air Fryer Rice Pudding Cups – Creamy Individual Desserts in 15 Minutes
Air Fryer Pork Chops – Juicy, Golden Perfection in 12 Minutes
FAQ About Air Fryer Corn on the Cob
Do I need to soak corn before air frying?
No soaking needed! Unlike grilling, air frying works best with completely dry corn. Just remove husks, brush with oil, and cook.
Can I use frozen corn on the cob?
Yes, but thaw completely and pat extra dry. Add 2-3 minutes to cooking time. Fresh corn gives better texture and flavor.
What if my air fryer is really small?
Cook one ear at a time if needed. The timing stays the same, but quality matters more than quantity!
How do I know when it’s perfectly done?
Look for bright yellow kernels with golden-brown spots. They should feel tender when pressed with a fork and have that sweet, concentrated corn aroma.
Can I make this oil-free?
You can skip the oil, but you won’t get the caramelization that makes this method special. Just 1 teaspoon makes a huge difference in flavor.

Air Fryer Corn on the Cob: Perfect in 12 Minutes
Ingredients
Equipment
Method
Notes
Safety Notes:
- Corn gets very hot – use tongs or corn holders
- Let rest before handling to avoid burns
- Ensure air fryer basket is not overcrowded
Success Tips:
- Remove ALL silk to prevent burning
- Pat completely dry for best caramelization
- Turn every 4 minutes for even cooking
- Don’t skip the oil – it helps browning
Common Mistakes to Avoid:
- Using wet or frozen corn without drying
- Overcrowding the basket
- Cooking at wrong temperature (too high causes popping)
- Not removing all silk strands
