

Last Update : 30/09/2025
Remember when chicken breast meant either dry, flavorless disappointment or hours of complicated prep work? After perfecting this recipe through countless weeknight dinners (and watching my family devour what they used to call “boring chicken” while asking for seconds), I can promise this air fryer chicken breast delivers perfectly juicy, golden results with the simplest technique that works every single time.
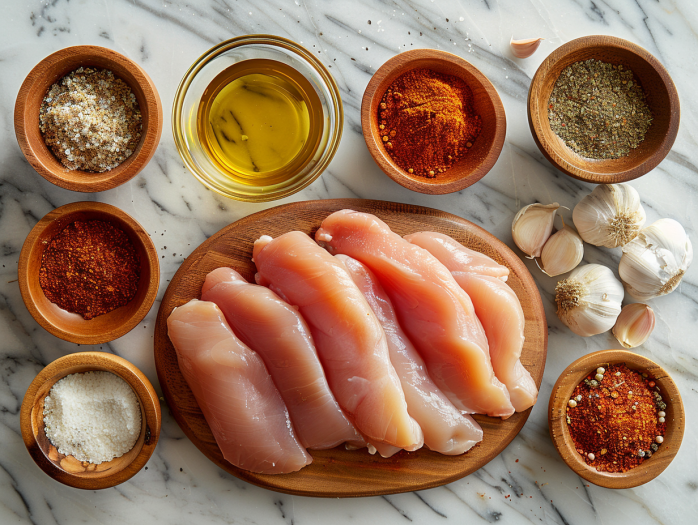
Essential Ingredients for Perfect Chicken Breast (Serves 4)
The Chicken:
- 4 boneless, skinless chicken breasts (6-8 oz each, similar size)
- 2 tablespoons olive oil (for moisture and browning)
Perfect Seasoning Blend:
- 1 tablespoon Italian seasoning
- 1 teaspoon garlic powder
- 1 teaspoon onion powder
- ½ teaspoon smoked paprika
- 1 teaspoon salt
- ½ teaspoon black pepper
- ½ teaspoon brown sugar (secret for golden color)
Equipment:
- Meat mallet or rolling pin (for even thickness)
- Instant-read thermometer (for perfect doneness)
- Cooking spray for air fryer basket
Pro tip: Choose chicken breasts that are similar in size for even cooking. If they vary significantly, save larger ones for another meal or pound them to match the thickness of smaller ones.
Step-by-Step Air Fryer Method
Perfect Prep Work (10 minutes)
Prepare the Chicken:
- Remove chicken from refrigerator 15-20 minutes before cooking
- Pat completely dry with paper towels—this is crucial for browning
- Place between plastic wrap or parchment paper
- Gently pound thick ends to create even ¾-inch thickness throughout
Create the Seasoning:
- Combine all dry seasonings in small bowl
- Mix thoroughly to distribute brown sugar evenly
- The brown sugar helps create beautiful caramelization
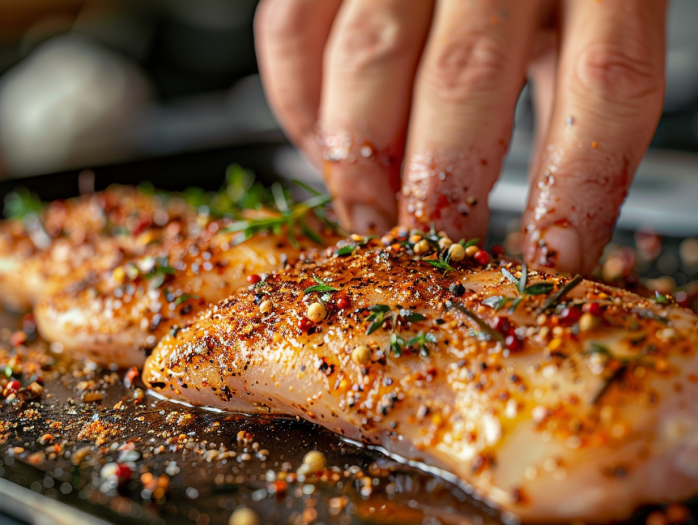
Season the Chicken:
- Drizzle olive oil over both sides of chicken
- Rub oil evenly to coat all surfaces
- Sprinkle seasoning mixture generously on both sides
- Press seasoning gently into meat for better adherence
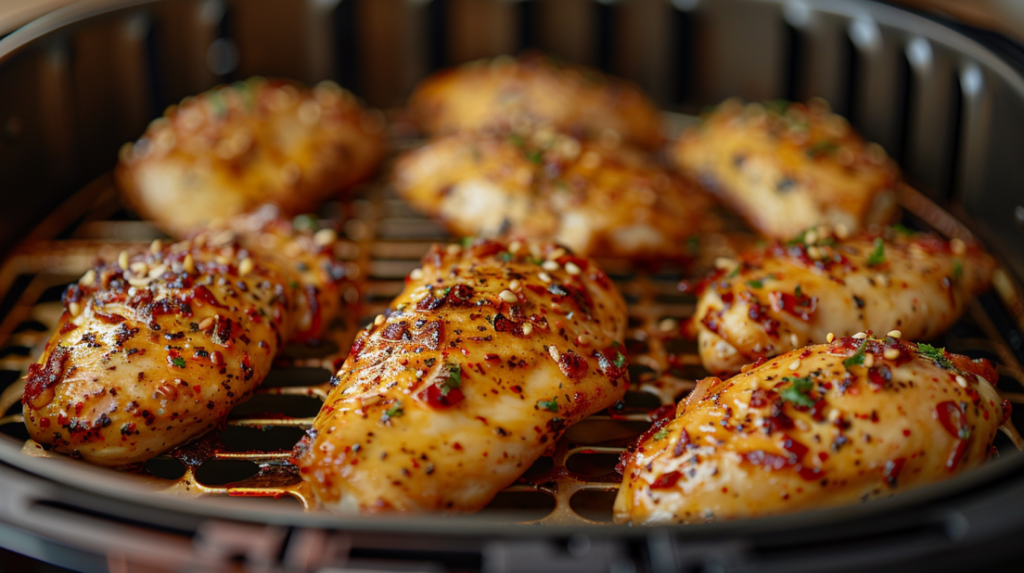
Air Fryer Cooking Process
Temperature: 375°F (190°C)
Time: 12-15 minutes total
Internal Target: 165°F (74°C)
Step 1: Preheat and Arrange
- Preheat air fryer for 3-5 minutes
- Spray basket lightly with cooking spray
- Place chicken smooth-side down in single layer
- Don’t overcrowd—cook in batches if needed
Step 2: First Cook Phase
- Cook 6 minutes without opening basket
- Chicken should be starting to develop golden color
- Resist the urge to peek—heat loss affects cooking
Step 3: Flip and Finish
- Carefully flip chicken using tongs
- Cook additional 6-9 minutes based on thickness
- Check internal temperature at thickest part
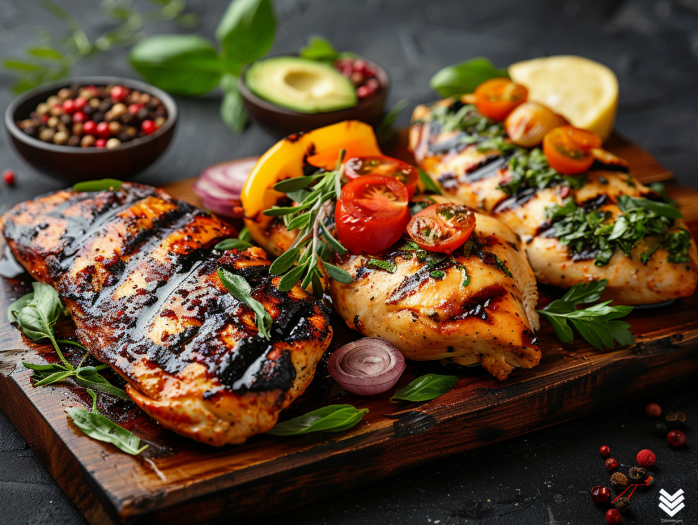
Step 4: Rest and Serve
- Remove when internal temp reaches 165°F
- Let rest 5 minutes before slicing—this is crucial!
- Juices will redistribute, ensuring maximum moisture
Visual cues for perfect doneness: Golden brown exterior, clear juices when pierced, firm but springy texture when gently pressed, and internal temperature of 165°F.
Family-Friendly Variations That Work
Classic Herb & Garlic
- Use recipe as written for foolproof results
- Serve with mashed potatoes and green vegetables
- Perfect for Sunday family dinners
Mediterranean Magic
- Add 1 teaspoon dried oregano and ½ teaspoon lemon zest
- Finish with squeeze of fresh lemon juice
- Serve with roasted vegetables and quinoa
Tex-Mex Fiesta
- Replace Italian seasoning with 1 tablespoon taco seasoning
- Add ½ teaspoon cumin and pinch of cayenne
- Perfect for burrito bowls and taco nights
Asian-Inspired
- Add 1 teaspoon ground ginger and ½ teaspoon garlic powder
- Finish with sesame oil drizzle and green onions
- Great over rice with steamed vegetables
BBQ Ranch
- Mix 1 packet ranch dressing mix with seasonings
- Add ½ teaspoon BBQ seasoning
- Serve with sweet potato fries and corn
Lemon Pepper Classic
- Use 2 teaspoons lemon pepper seasoning
- Add 1 teaspoon garlic powder and ½ teaspoon onion powder
- Finish with fresh lemon wedges
Buffalo Style
- Add 1 teaspoon hot sauce powder or cayenne
- Brush with buffalo sauce after cooking
- Serve with celery sticks and blue cheese
Healthy Herb Blend
- Use fresh herbs: 1 tablespoon chopped rosemary and thyme
- Reduce salt to ½ teaspoon
- Finish with fresh herbs after cooking
Storage & Meal Prep Tips
Fresh Storage:
- Refrigerated: Up to 4 days in airtight container
- Best quality: Consume within 2-3 days for optimal texture
- Slice before storing: For faster reheating and easy meal assembly
Meal Prep Strategy:
- Cook once, eat all week: Make 6-8 breasts on Sunday
- Portion immediately: Divide into meal-sized containers
- Add variety: Season different batches with different spice blends
- Freeze portions: Individual servings freeze up to 3 months
Reheating Methods:
- Air fryer: 300°F for 3-4 minutes (best texture restoration)
- Microwave: 30-45 seconds covered with damp paper towel
- Skillet: 2-3 minutes with splash of broth to prevent drying
Leftover Magic:
- Salad topper: Slice over greens with favorite dressing
- Sandwich filling: Perfect for wraps, paninis, or grain bowls
- Pasta addition: Dice and toss with marinara and pasta
- Soup protein: Add to any soup in last few minutes of cooking
Pro tip: Cook extra chicken on weekends for instant protein all week. It transforms simple salads into satisfying meals and makes healthy eating effortless.
Frequently Asked Questions
Can I cook frozen chicken breast in the air fryer?
Yes, but add 5-7 minutes to cooking time and start at 360°F for more even thawing. You won’t be able to pound it thin or season as well, so fresh is always better for optimal results.
Why does my chicken always come out dry?
The most common cause is overcooking. Use an instant-read thermometer and remove at exactly 165°F. Also ensure you’re letting it rest 5 minutes before cutting, this step is crucial for moisture retention.
How do I know when the chicken is perfectly cooked?
Internal temperature should reach 165°F at the thickest part. The chicken should be golden brown, feel firm but springy when pressed, and juices should run clear when pierced.
Can I cook different sized chicken breasts together?
It’s best to use similar sizes for even cooking. If sizes vary significantly, pound thicker pieces to match thinner ones, or remove smaller pieces earlier when they reach temperature.
Do I need to flip the chicken during cooking?
Yes, flipping ensures even browning and cooking. Flip once halfway through the cooking time using tongs to avoid piercing the meat.
Ready to transform your weeknight dinners? This air fryer chicken breast proves that simple techniques and quality ingredients create the most satisfying meals, no fancy tricks required.
For more family-tested air fryer proteins that make dinner planning effortless, check out our Complete Air Fryer Chicken Recipes Collection with 15+ crowd-pleasing favorites. Follow us on Pinterest for daily meal inspiration!
Nashville Hot Chicken – Crispy Spicy Chicken with Fiery Nashville Sauce
Hamburger Steak with Brown Gravy – Comfort Food Perfection in 30 Minutes
Air Fryer BBQ Chicken Legs – Crispy Skin, Juicy Meat in 25 Minutes