
The Ultimate Guide to Irish Soda Bread Scones:Recipes, and Tips
Irish Soda Bread Scones are a delightful fusion of two beloved baked goods: the rustic charm of Irish soda bread and the tender, flaky texture of scones. Whether you’re a seasoned baker or a beginner, these scones offer a simple yet satisfying treat that’s perfect for breakfast, tea time, or even a savory snack. In this article, we’ll explore everything you need to know about Irish soda bread scones, from their rich history and key ingredients to step-by-step recipes and creative variations. By the end, you’ll be ready to whip up a batch of these delicious scones that are sure to impress your family and friends.
Introduction :
What Are Irish Soda Bread Scones?
Imagine the hearty, slightly tangy flavor of Irish soda bread combined with the light, crumbly texture of a classic scone. That’s exactly what Irish soda bread scones are all about! These scones are made with simple ingredients like flour, baking soda, and buttermilk, which give them their signature rise and flavor. Unlike traditional scones that use butter and cream, these scones rely on the magic of buttermilk and baking soda to create a soft, airy crumb.
What sets them apart is their versatility. You can enjoy them plain, studded with raisins, or even packed with savory ingredients like cheese and herbs. They’re quick to make, too—no yeast or lengthy rising times required.
Why Irish Soda Bread Scones Are a Beloved Treat
Irish soda bread scones have a special place in both Irish and global baking traditions. In Ireland, soda bread has been a staple for centuries, thanks to its simplicity and reliance on basic pantry ingredients. When transformed into scones, this humble bread becomes a portable, crowd-pleasing treat that’s perfect for any occasion.
Today, these scones are celebrated not just for their taste but also for their cultural significance. They’re a nod to Ireland’s resourceful baking heritage, where buttermilk and baking soda were used to create delicious bread without the need for expensive or hard-to-find ingredients. Whether you’re enjoying them with a cup of tea or serving them at a family gathering, Irish soda bread scones are a timeless treat that brings people together.
Key Ingredients for Authentic Irish Soda Bread Scones
Essential Ingredients and Their Roles
The beauty of Irish soda bread scones lies in their simplicity. You only need a handful of basic ingredients to make them, but each one plays a crucial role.
- Flour: The backbone of any scone, flour provides structure. While all-purpose flour works well, some bakers prefer using whole wheat flour for a heartier texture.
- Baking Soda: This is the leavening agent that gives the scones their rise. When combined with buttermilk, it creates a chemical reaction that produces carbon dioxide, making the dough light and airy.
- Buttermilk: The secret weapon of Irish soda bread scones, buttermilk adds moisture and a subtle tanginess. It also activates the baking soda, ensuring the scones rise properly.
- Salt: A pinch of salt enhances the flavors of the other ingredients, balancing the tanginess of the buttermilk.
Optional Add-Ins for Flavor Variations
While the basic recipe is delicious on its own, you can easily customize Irish soda bread scones with a variety of add-ins.
- Sweet Options: Raisins, currants, or dried cranberries are popular choices for a touch of sweetness. A sprinkle of sugar on top adds a delightful crunch.
- Savory Options: For a savory twist, try adding grated cheese, chopped herbs, or even diced vegetables. These variations make the scones perfect for pairing with soups or salads.
By understanding the role of each ingredient, you can confidently experiment with flavors and textures, making Irish soda bread scones your own.
Step-by-Step Recipe :
Classic Irish Soda Bread Scone Recipe
Making Irish soda bread scones is easier than you might think! With just a few simple steps, you can create a batch of these delicious treats that are perfect for any occasion. Here’s how to do it:
Ingredients:
2 cups all-purpose flour
1 teaspoon baking soda
1/2 teaspoon salt
1 cup buttermilk (plus extra for brushing)
1/4 cup raisins or currants (optional)
Instructions:
Begin by Heating the Oven: Set your oven to 425°F (220°C) and allow it to preheat fully before you start baking. Line a baking sheet with parchment paper.
Combine Dry Ingredients: In a spacious mixing bowl, thoroughly whisk the flour, baking soda, and salt until evenly blended. If you’re adding raisins or currants, toss them in the flour mixture to coat them evenly.
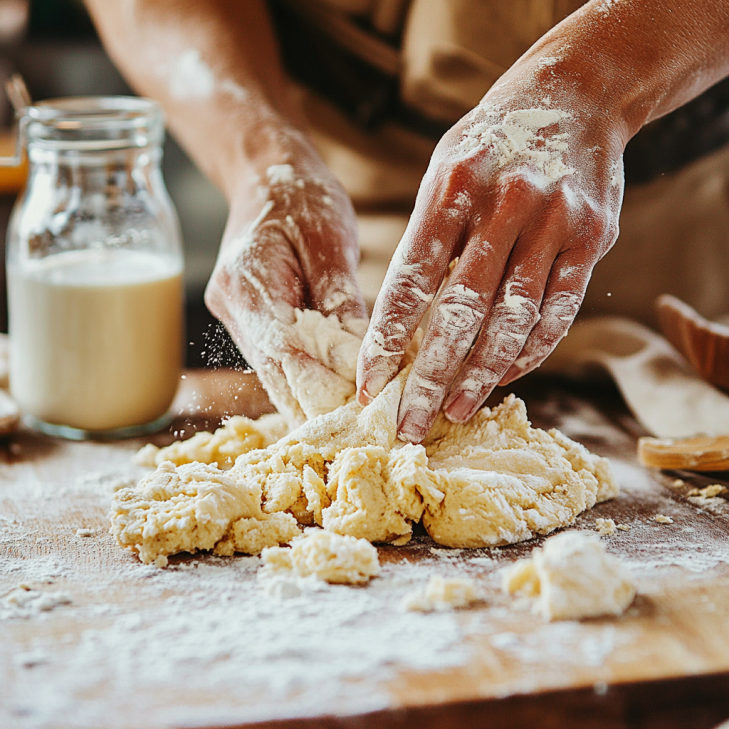
Add Buttermilk: Make a well in the center of the dry ingredients and pour in the buttermilk. Using a wooden spoon or your hands, mix until the dough just comes together. Be careful not to overmix, as this can make the scones tough.
Shape the Dough: Turn the dough out onto a lightly floured surface and gently pat it into a circle about 1 inch thick. Cut the circle into 6-8 wedges, like a pizza.
Bake: Place the wedges on the prepared baking sheet, leaving space between each one. Lightly brush the tops with a bit of extra buttermilk to achieve a beautifully golden and glossy finish.Bake for 12-15 minutes, or until the scones are golden brown and sound hollow when tapped on the bottom
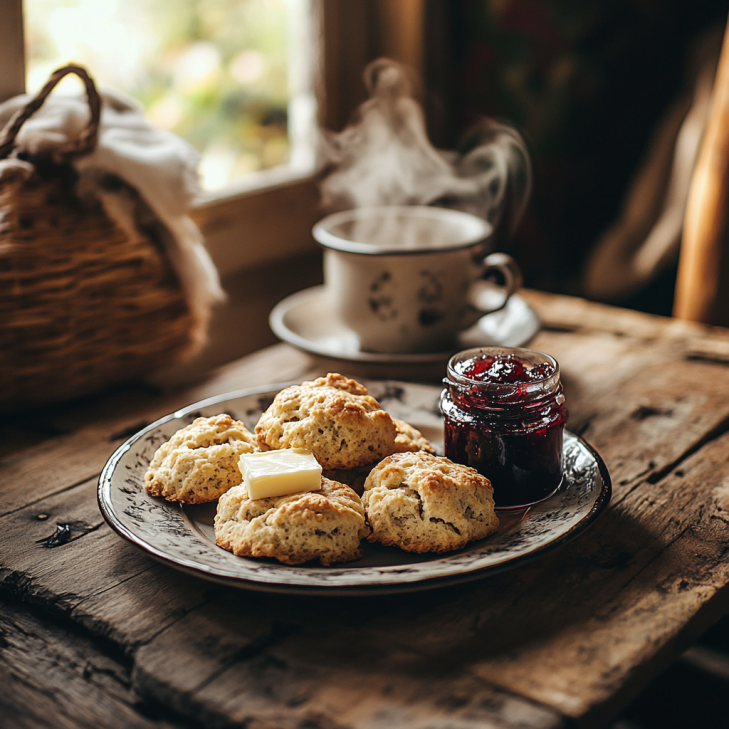
Cool and Serve: Let the scones cool on a wire rack for a few minutes before serving. Enjoy these warm, delicious treats topped with a spread of butter, your favorite jam, or a dollop of rich clotted cream for the ultimate indulgence.
Common Mistakes to Avoid
Even though Irish soda bread scones are simple to make, there are a few pitfalls to watch out for:
Avoid Overmixing: Be careful not to overmix the dough, as this can result in scones that are tough and dense instead of light and fluffy. Mix just until the ingredients come together.
Using Cold Buttermilk: Room temperature buttermilk works best for even mixing and rising.
Skipping the Buttermilk Brush: Brushing the tops with buttermilk gives the scones a beautiful golden color and a slightly crisp crust.
By following these tips, you’ll be able to bake perfect Irish soda bread scones every time.
Variations of Irish Soda Bread Scones
Sweet Variations
If you’ve got a sweet tooth, you’ll love these creative twists on Irish soda bread . Here are some inspiring ideas to help you begin your journey.
Fruit-Studded Scones: Add a handful of raisins, currants, or dried cranberries to the dough for a burst of sweetness. You can also try chopped apricots or figs for a more exotic flavor.
Honey or Maple Glaze: Drizzle a simple glaze made with honey or maple syrup over the cooled scones for an extra touch of sweetness.
Cinnamon Sugar Topping: Before baking, sprinkle the scones with a mixture of cinnamon and sugar for a warm, spiced flavor.
These sweet variations are perfect for breakfast or afternoon tea, and they pair wonderfully with a cup of coffee or tea.
Savory Variations
For those who prefer savory treats, Irish soda bread can easily be adapted to suit your taste. Here are some delicious options:
Cheese and Herb Scones: Add grated cheddar cheese and chopped herbs like chives or rosemary to the dough. These scones are fantastic served with soup or as a side dish for dinner.
Bacon and Scallion Scones: Mix in cooked, crumbled bacon and finely chopped scallions for a hearty, savory scone that’s perfect for brunch.
Olive and Sun-Dried Tomato Scones: Fold in chopped olives and sun-dried tomatoes for a Mediterranean-inspired twist.
These savory variations are incredibly versatile and can be enjoyed at any time of day. Whether you’re hosting a gathering or simply treating yourself, these scones are sure to impress.

Serving and Storing :
Best Ways to Serve :
Once you’ve baked a batch of Irish soda bread scones, the next step is serving them in a way that highlights their delicious flavor. Here are some ideas:
- Warm with Butter: There’s nothing quite like a warm scone slathered with butter. The creamy richness of the butter complements the slightly tangy flavor of the scones perfectly.
- Jam or Clotted Cream: For a classic treat, spread your scones with strawberry jam or clotted cream. This combination is a staple of British and Irish tea times.
- Pair with Tea or Coffee: Irish soda bread scones are a natural match for a hot cup of tea or coffee. The warmth of the drink enhances the scones’ comforting qualities.
Whether you’re enjoying them for breakfast, as a snack, or as part of a larger meal, these scones are sure to delight.
How to Store and Reheat
To keep your Irish soda bread scones fresh and tasty, follow these storage tips:
- Storage Tips: Keep your scones fresh by storing them in an airtight container at room temperature for up to two days. To avoid sticking, place a sheet of parchment paper between each layer.
- Freezing: If you want to keep them longer, freeze the scones in a single layer on a baking sheet before transferring them to a freezer-safe bag. They’ll stay fresh for up to 3 months.
- Reheating: To revive frozen or day-old scones, warm them in a 350°F (175°C) oven for 5-10 minutes. This will restore their crisp exterior and soft interior.
By storing and reheating your scones properly, you can enjoy their delicious flavor anytime.
FAQs
What Makes Irish Soda Bread Scones Unique?
Irish soda bread scones stand out because they combine the simplicity of traditional soda bread with the tender, flaky texture of scones. They’re quick to make and require only basic ingredients, making them a versatile treat for any occasion.
Can I Make Irish Soda Bread Scones Without Buttermilk?
Yes, you can! If you don’t have buttermilk, you can make a substitute by adding 1 tablespoon of lemon juice or vinegar to 1 cup of milk. Let it sit for 5 minutes before using.
How Do I Prevent My Scones from Being Too Dry?
The key to moist scones is not overmixing the dough and using the right amount of buttermilk. Also, avoid overbaking—stick to the recommended baking time.