
This delicious Hawaiian Roll Grilled Cheese comes together in about 15 minutes and is cooked on the stovetop for a quick lunch or dinner that your family will love! Switch up the ingredients to suit your taste or use it as a ‘clean out the fridge’ meal to get rid of leftovers and odds and ends!
Ingredients Breakdown
- Hawaiian Rolls
- Monterey Jack Cheese
- Unsalted Butter
- Optional Add-ins
How to Make the Hawaiian Roll Grilled Cheese
So, here’s how it all shakes down, let’s get cooking!
Slice the Rolls : Slice the Hawaiian rolls in half without cutting all the way through. You want to create a lovely pocket for all that impressive cheese!
Butter the Insides : Preheat a non-stick skillet over medium heat, and spread butter on the insides of each roll. Get that dreamy, buttery flavor in there!
Add the Cheese : Place the bottom halves of the rolls on the skillet and fill generously with shredded cheese. Don’t be shy; the more the cheese, the better!
Press and Grill : Press down slightly with the top halves and let it grill until golden brown, about 3-4 minutes per side, flipping carefully. Feel free to aromatically enjoy the irresistible smell wafting through the kitchen!
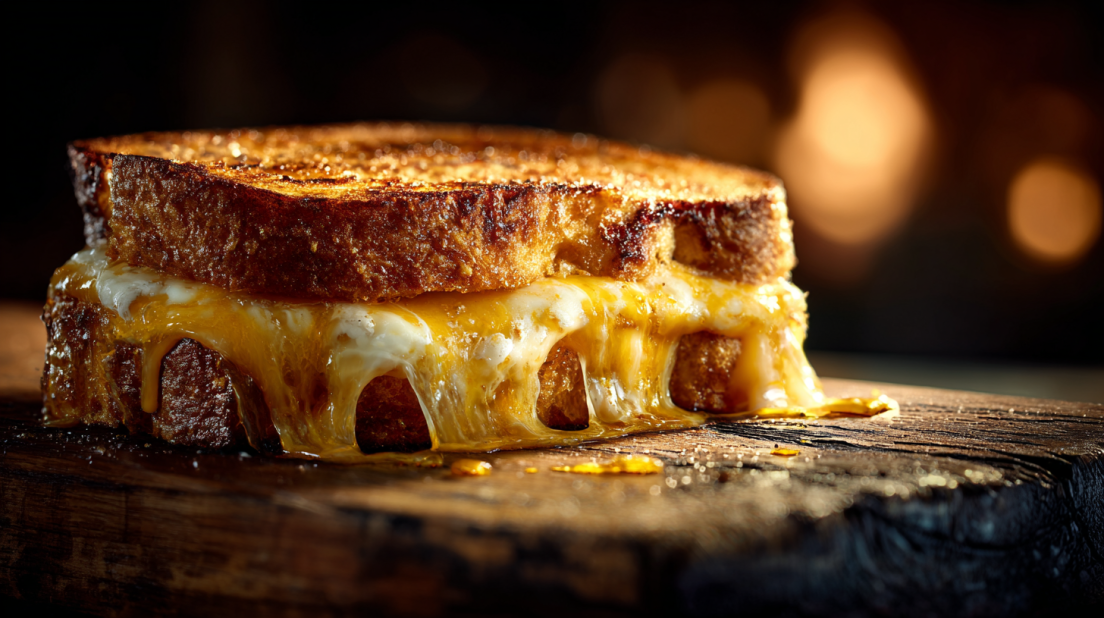
Serve Hot : Once both sides are crispy and the cheese is melty, remove from heat, slice, and serve hot. Maybe with a side of tomato soup? Classic!
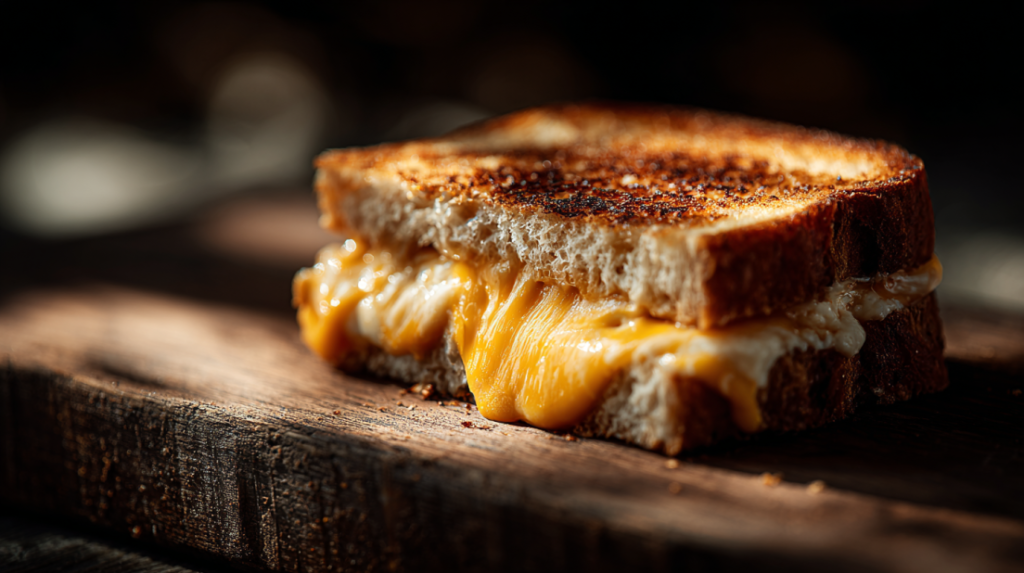
And there you have it! Easy peasy, right? This Hawaiian Roll Grilled Cheese is such a breeze to whip up, and the results are totally drool-worthy!
Why I Love This Recipe
Honestly, this is my go-to recipe when I’m struggling to decide what to make. It’s like a hug in food form! A true comfort food, it checks all the boxes, quick, easy and oh-so-delicious. Plus, there’s something about the sweet rolls paired with melty cheese that I’m a real sucker for! The best part is that you can use whatever you’ve got on hand, making it perfect for a weeknight dinner, or even just when you need a little pick-me-up.
If you loved this Hawaiian Roll Grilled Cheese, be sure to check out my Savory Chuck Roast, my Miso Roasted Delicata Squash Rings, or my Homemade Spaghettio!
Why This Recipe Works
Quick & Easy
This Hawaiian Roll Grilled Cheese is a breeze to make, coming together in under 15 minutes. Perfect for busy weeknights or those lazy Sundays when you just want something warm and comforting.
Customizable
One of the best things about this recipe is how easily you can adapt it! Use whatever ingredients you have on hand. Feeling adventurous? Add a spicy jalapeño or some gourmet cheese!
Crowd-Pleaser
Whether it’s a lunch at home with the kids or a quick dinner with friends, the whole family will love it. Who wouldn’t? Crispy, golden bread filled with gooey cheese is a winner every time.
Budget-Friendly
Using everyday pantry staples like rolls and cheese, this recipe won’t break the bank. You can totally make this even when times are tight!
Comfort Food
It’s loaded with tons of flavor, reminding you of cozy times spent in the kitchen. There’s something really heartwarming about digging into a tasty grilled cheese with a side of tomato soup, bring on the napkin!
Serving Suggestions
Pair your delightful Hawaiian Roll Grilled Cheese with a warm, comforting bowl of tomato soup or a fresh green salad. You could even dip it into creamy ranch or spicy marinara sauce for an extra kick. Yum!
Storage Tips
This grilled cheese keeps well for about 3-4 days in the fridge. Just pop it in a sealed container to keep it fresh.
Reheating Instructions
To reheat, I recommend using a skillet over medium-low heat to ensure the cheese gets melty again without burning the bread. You could also throw it in the oven at 350°F for about 10 minutes, flipping halfway through.
Freezer Friendly?
Unfortunately, I wouldn’t recommend freezing filled sandwiches. The bread tends to get soggy once thawed. But if you really want to prep ahead, you could prep the ingredients and make them fresh!
I can’t wait for you to whip up this Hawaiian Roll Grilled Cheese at home! Seriously, it’s a total game-changer and just perfect for satisfying those comfort food cravings. The combination of sweet rolls and melting cheese is just… chef’s kiss! Don’t forget to share your creation with me. I love seeing what ya’ll cook up! Follow LunaChef on Pinterest for daily meal inspiration and air fryer cooking tips.
Hawaiian Roll Grilled Cheese
Ingredients
Method
- Slice the Hawaiian rolls in half without cutting all the way through to create a pocket for the cheese.
- Preheat a non-stick skillet over medium heat and spread butter on the insides of each roll.
- Place the bottom halves of the rolls on the skillet and fill them generously with shredded cheese.
- Press the top halves down slightly and grill until golden brown, about 3-4 minutes per side, flipping carefully.
- Once both sides are crispy and the cheese is melty, remove from heat, slice, and serve hot.